
Contents

Introduction
Clients are different from accounts, reporting groups and Households. A client is a unique contact—represented by an email address—for an individual person. Clients can be assigned to only one Household at a time. Clients control the email address of the client as well as the client view and report delivery methods for reports.

We recommend creating a client even if you don't plan on enabling client portal access. This will make it easier to take advantage of features we have planned for the future.
Enable/Disable Client Portals
For more information about client portals, see Learn More About Client Portals.
For information about enabling and disabling client portal access for clients, see:

Create a Client
You can create clients one at a time on the Clients page, or create multiple clients at once using a bulk upload.
Create a Single Client
To create a client:
-
On the Accounts menu, click Clients/Client Portals.
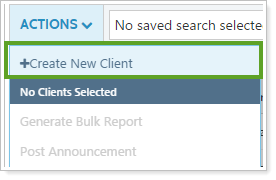
-
In the Actions list, click Create New Client.
-
In the New Client panel, complete the following options (click the panel names below to access detailed descriptions of those panels and their settings):
The Client Profile Panel. Enter the email address and name for the client and assign the Household for the client (required for enabling client portal access). Only one household can be assigned to each client. The Household determines the accounts and groups that the client can see when signing into the client portal.
The Client Portal Panel. Determine the look of the client portal and enable portal access for the client.
The Client Administrator Panel. Assign a client administrator—it's best to assign more than one client administrator to each client. When the user posts documents to the client portal, the client administrator is the user who will be notified. Client administrators will be replaced with service teams in a future release of Advisor View, but currently they control document notifications.
-
Click Save.
Create Multiple Clients at Once With a Bulk Upload
To create multiple clients at the same time using an upload, follow these steps:
-
In the Reports menu, under Global Reports, click Bulk Reports.
-
Click Create Report.
-
In Report Type, choose Client Information.
-
In Name, type a descriptive name.
-
Add at least the following columns to the Client Information bulk report:
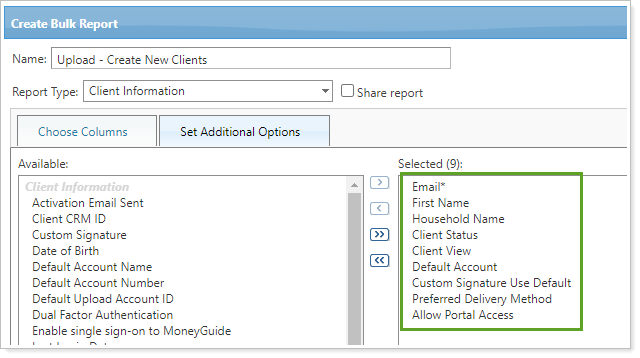
Column Content Requirements Email Type a unique email address. This is required. First Name Type the client's first name. It is not recommended that you combine the client's full name in just the First Name field, as this can cause issues with integrations. Last Name Optionally type the client's last name. Household Name To assign the client to a Household, type the Household name exactly as it appears on the Households page. Client Status If you use the MoneyGuide or Salesforce integrations, we recommend that you assign client status. For more information, see Create and Maintain Households: The Clients Panel. Default Account If you plan to assign the client to a client portal, set the account the client sees when they log in to the portal. For more information, see Creating a Client: The Client Portal Panel. Custom Signature Use Default Set what signature clients see on automatic emails sent from Tamarac. For more information, see Creating a Client: The Client Portal Panel and Customize the Automated E-mail Messages that Advisor View Sends.
Preferred Delivery Method Set to determine how clients receive PDF reports. For more information, see Assign a Default Report Delivery Method.
Allow Portal Access To activate the client portal for the new client, choose Yes. For more information, see Creating a Client: The Client Portal Panel. -
Click Save.
-
Generate the new Client Information bulk report you created. For more information, see Bulk Reports.
-
Clear any existing client data from the CSV file, but keep the column headers.
-
Enter the new client data and save the edited CSV.
-
In Tamarac, under the Setup menu, click Upload.
-
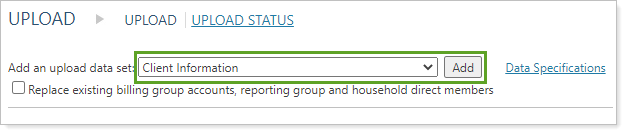
In Add an upload data set, choose Client Information and click Add.
-
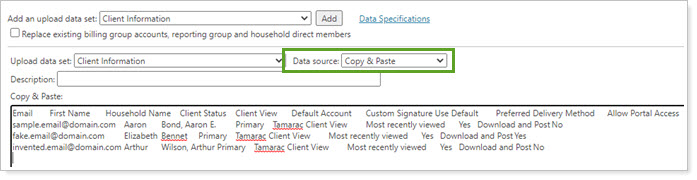
In Data source, choose your preferred method for uploading.
-
Complete the upload. For steps, see Bulk Data Uploading.
Edit a Single Client
To make changes to an existing client:
-
On the Accounts menu, click Clients/Client Portals.
-
Click the name of the client you want to edit.
-
On the Edit Client panel, edit any of the follow panels (click the panel names below to access detailed descriptions of those panels and their settings):
-
The Client Profile Panel. Enter the email address and name for the client and assign the Household for the client (required for enabling client portal access). Only one household can be assigned to each client. The Household determines the accounts and groups that the client can see when signing into the client portal.
-
The Client Portal Panel. Determine the look of the client portal and enable portal access for the client.
-
The Client Administrator Panel. Assign a client administrator—it's best to assign more than one client administrator to each client. When the user posts documents to the client portal, the client administrator is the user who will be notified. Client administrators will be replaced with service teams in a future release of Advisor View, but currently they control document notifications.
-
-
Click Save.
Delete a Client
To delete a client:
-
On the Accounts menu, click Clients/Client Portals.
-
Click the name of the client you want to delete.
-
On the Edit Client panel, click Delete. Only clients with a Portal Status of Inactive can be deleted.

Edit or Delete Multiple Clients at Once
To make changes to multiple clients at once:
-
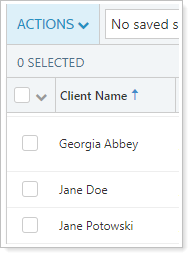
On the Accounts menu, click Clients/Client Portals.
-
Select the check box next to one or more clients you want to edit and then, in the Actions list, click Edit or Delete. Only clients with a Portal Status of Inactive can be deleted.
-
For deleting, in the Delete Client window, click Delete.
For editing, on the Edit Client panel, edit any of the follow panels and then click Save. Note that if a setting doesn't appear, it cannot be set in bulk and must be set on a client-by-client basis.
Click the panel names below to access detailed descriptions of those panels and their settings.
The Client Profile Panel. Enter the email address and name for the client and assign the Household for the client (required for enabling client portal access). Only one household can be assigned to each client. The Household determines the accounts and groups that the client can see when signing into the client portal.
The Client Portal Panel. Determine the look of the client portal and enable portal access for the client.
The Client Administrator Panel. Assign a client administrator—it's best to assign more than one client administrator to each client. When the user posts documents to the client portal, the client administrator is the user who will be notified. Client administrators will be replaced with service teams in a future release of Advisor View, but currently they control document notifications.