
Contents

Introduction
A service team defines the team members that will be directly involved with servicing a Household. For example, a service team may consist of a trader, customer service associate, primary advisor and secondary advisor. With the service team structure in place, Advisor View will facilitate internal communication and workflows in future releases.
To begin creating service teams, we recommend the following workflow:
-
Create your generic users. When creating service teams, all users with a login to Advisor View will be available to assign to a service team. However, when setting up your service teams, sometimes you'll want to use an email distribution list. Generic users let you do that. For details, visit Generic Users.
-
Create Your Service Roles. Service Roles help you organize your service team members into categories – Compliance, Customer Support, Primary Advisor, or any other category you want. The roles define how you want to structure your service team, so you should spend some time thinking about the roles you want to create. For details, visit Service Roles.
-
Create the Service Team. Once you've created your generic users and service roles, you can create your service teams. You can create as many service teams as you want, but only one service team can be assigned to a Household. For example, you can have different service teams for each client segment (Team A, Team B, Team C, etc.), but you can't assign multiple teams to a Household. For details, visit Create a Service Team.
-
Assign a Service Team to a Household. Once you've set up your service teams, you can assign them to Households. You can do this in one of the following ways:
-
through a Household multi-edit process
-
through an uploaded data set
-
directly through the Advisor View user interface
For details, visit Assign a Service Team to a Household.
-
In future releases, we'll offer ways to leverage the full potential of service teams. We are planning some exciting things—like Advisor CRM integration and workflow functionality—so setting up service teams now will ensure that you can take full advantage of the functionality when these features are delivered.

Generic Users
When creating service teams, all users with a login to Advisor View will be available to assign to a service team. However, when setting up your service teams, sometimes you'll want to use an email distribution list. Generic users let you do that. Here are some examples of when you'd want to use a generic user:
-
To Keep Everyone In The Loop. If your processes include multiple team members in the firm, you may want to include multiple team members on the automated email messages Advisor View sends. Instead of using an account associated with a specific person like john.smith@cherrystreetfinancial.com, you'll want to use an email distribution list such as trading@cherrystreetfinancial.com. By using an email distribution list, you can ensure all the necessary team members are included in the email notifications.
-
Make Fewer Updates. If you anticipate a team member will transition to a new role, a generic user means you won't have to remember to update the email address in Advisor View. When a team member leaves, your IT team can remove the team member from the distribution list and add the replacement team member.
-
Builds More Scalable Processes. In most cases, you'll want a "backup" team member for the actionable email messages that Advisor View sends. That way, if the primary person is out of the office, the backup can perform the task in the primary person's absence. Instead of using an email like john.smith@cherrystreetfinancial.com, you can use a distribution list like team1@cherrystreetfinancial.com, so you won't have to update the email address when someone goes in vacation.
-
You Want to Notify Non-Advisor View Users. If you want Advisor View to email users that don't access Advisor View, you can use a generic user to keep them in the loop—without creating an associated login to Advisor View.
Create a Generic User
To create a generic user:
-
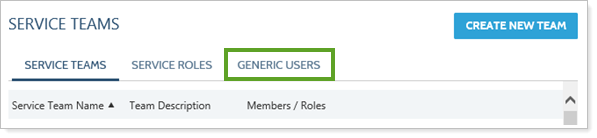
On the Setup menu, under Firm Settings, click Service Teams.
-
On the Service Teams page, click Generic Users.
-
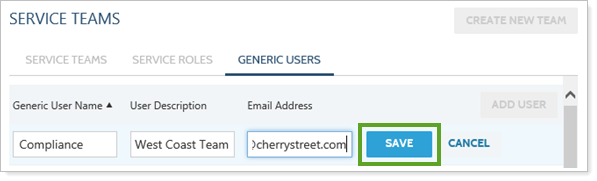
Click Add User.
-
Complete the following:
Generic User Name. Type a name for the generic user. This name will appear in all lists where you'd assign generic users to service teams, so it's best to use a name that's descriptive. The user name must be unique; however, you can assign multiple users to the same role.
User Description. Type a long description for the generic user.
Email Address. Type an email address for the generic user. This email address can be a distribution list, such as trading@cherrystreetfinancial.com, or it can be a single email address like john.smith@cherrystreetfinancial.com. At this time, Advisor View does not support including multiple email addresses.
-
Click Save.
Editing a Generic User
To make changes to an existing generic user:
-
On the Setup menu, under Firm Settings, click Service Teams.
-
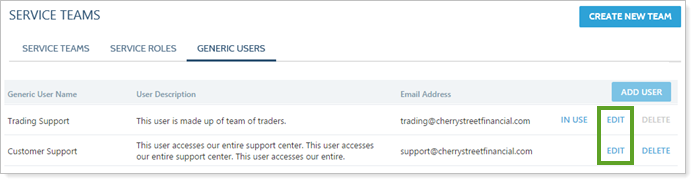
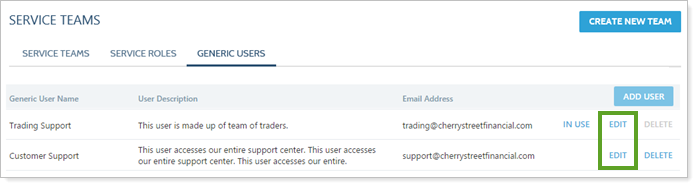
On the Generic Users tab, click Edit next to the generic user you want to edit.
-
Make the necessary changes and then click Save.
Delete a Generic User
You can delete a generic user at any time. If the generic user is in use and assigned to a service team, the role will be removed from any Household where the generic user is assigned—for example, if John Smith is assigned to the Trading role, Advisor View will remove the Trading role for every Household where John Smith is assigned to the Trading role.
Before deleting a generic user, you can click the In Use link to see where the generic user is in use. After clicking the link, you will be prompted to download a CSV document that lists the assignments.
To delete an existing generic user:
-
On the Setup menu, under Firm Settings, click Service Teams.
-
On the Generic Users tab, click Delete next to the user you want to delete.
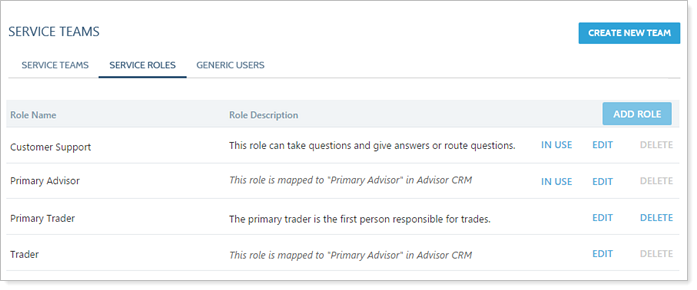
Service Roles
Service Roles help you organize your service team members into categories – Compliance, Customer Support, Primary Advisor, or any other category you want. When creating service roles, it’s best to give lots of thought to the roles that make sense for your firm – and be specific when doing so will add clarity and efficiency. While there is no single organization method that works for all firms, thinking carefully about what makes the most sense will help you create the right roles. Just be careful about the number of roles you create – a large number of roles will make maintenance and merge fields more difficult in future releases.
When you first visit Service Roles, Advisor View will include the following default roles: Compliance, CSA, Operations, Primary Advisor, Secondary Advisor, Trader, and Trade Approver. You can rename these default roles for your firm.
Note
Even with the Service Team integration, the Primary Advisor role cannot be deleted—all Service Teams must contain the Primary Advisor role.
Users can be assigned to multiple roles in the Household - for example, you can assign John Smith as the Primary Advisor and Trader for a Household. Similarly, multiple users can be signed the same role - for example, John and Jane can both be traders in the same service team.
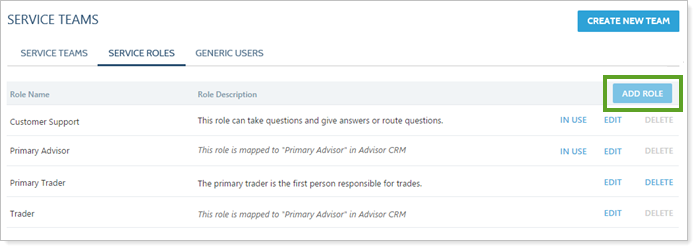
Create a Service Role
To create a service role:
-
On the Setup menu, under Firm Settings, click Service Teams.
-
On the Service Roles tab, click Add Role.
-
Complete the following settings:
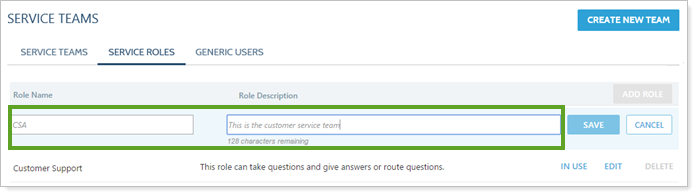
Role Name. Type a name for the service role. The name can be anything you want, such as Compliance, Customer Support, Training, etc. The role name must be unique.
Description. Type a long description for the service role.
-
Click Save.
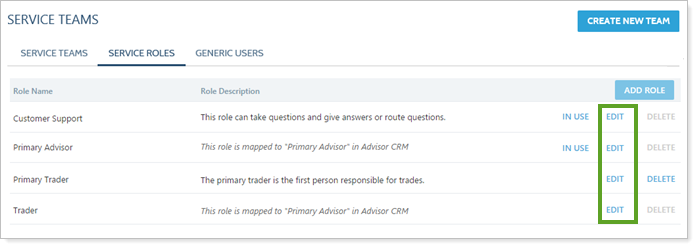
Edit a Service Role
To edit a service role:
-
On the Setup menu, under Firm Settings, click Service Teams.
-
On the Service Roles tab, click Edit next to the role you want to edit.
-
Make your changes and then click Save.
Delete a Service Role
You can delete a service role at any time. If the role is assigned to a service team, Advisor View will remove the role from any Household where it is assigned - for example, if you've assigned the Trader role to 50 Households, it will be removed from all 50 Households.
Before deleting a service role, you can click the In Use link to see where the role is in use. After clicking the link, Advisor View will prompt you to download a CSV document that lists the assignments.
To delete a service role:
-
On the Setup menu, under Firm Settings, click Service Teams.
-
On the Service Roles tab, click Delete next to the role you want to delete.
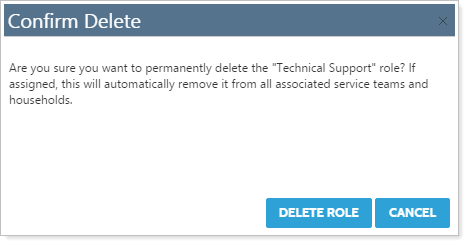
-
On the Confirm Delete dialog, click Delete Role.
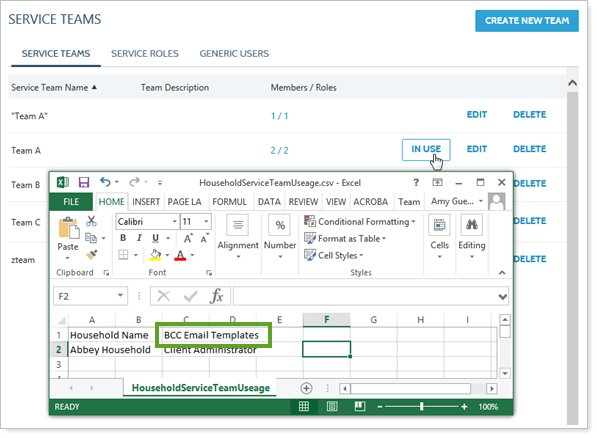
See Which Service Roles are Blind Copied on Automated Client Emails
You can quickly identify which service roles are blind copied for each email template with the In Use report.
To access this report:
-
On the Setup menu, click Service Teams.
-
Click In Use for any Service Team, then review the BCC Email Templates column.
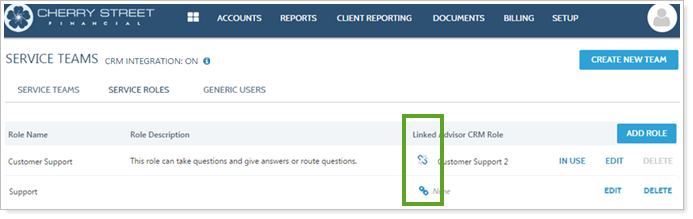
Unlink Service Roles From Advisor CRM
If you've linked a Service Role from Advisor View to Advisor CRM, it is possible to unlink them, but we don't recommend it unless you will never have a need for that role in Advisor CRM.
Important
If you unlink a role with the Service Team integration enabled, changes in Advisor View will not be synced to that role in Advisor CRM, and you will be unable to update the role for any team in Advisor CRM.
To unlink Service Roles:
-
On the Setup menu, click Service Teams.
-
Click the Service Roles tab.
-
In the Linked column, linked roles are indicated with a broken link icon (
 ). Click this icon for the roles you want to unlink.
Setting Up & Maintaining Service Teams
Once you've created your generic users and service roles, you can create your service teams.
Create a Service Team
To create a service team:
-
On the Setup menu, under Firm Settings, click Service Teams.
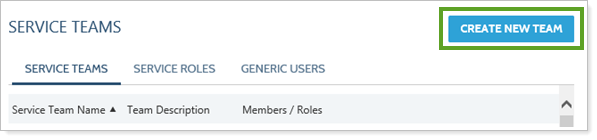
-
Click Create New Team.
-
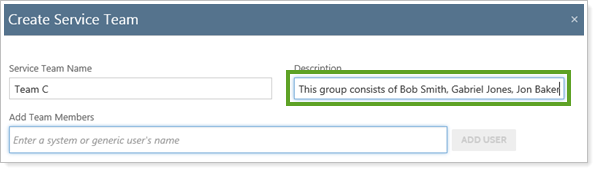
In the Service Team Name box, type a name for the service team. This name must be unique.
-
In the Description box, type a description for the service team.
-
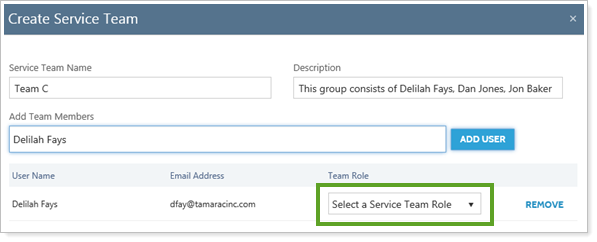
In the Add Team Members box, start typing the name of an Advisor View user or generic user. When you see the desired user name in the list, click it and then click Add User. Repeat this step for each user you want to add to the service team.
-
In the Team Role list for each user, select the appropriate service role.
Roles do not have to be unique—for example, two users can be assigned to a Compliance role. If you want multiple users to be assigned the same role, it's sometimes best to create a generic user that leverages an email distribution list, so that way you can maintain the users as part of your IT process. For more information on how you can use generic users, visit Generic Users.
-
Click Create Team.
Assign a Service Team to a Household
To assign a service team to a Household:
-
On the Accounts menu, click Households.
-
Click the name of the Household where you want to assign the service team.

-
Click the Service Team menu.
-
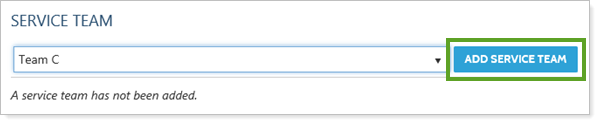
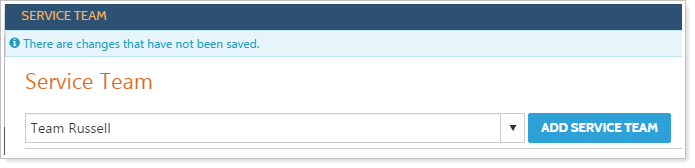
In the Select a Service Team box, start typing the name of the service team you want to assign to the Household. You can only assign one service team to a Household. When you see the team in the list, click it and then click Add Service Team.
-
Click Save.
Change the Service Team for a Household
To change the service team that's assigned to a Household:
-
On the Accounts menu, click Households.
-
Click the name of the Household where you want to change the assigned service team.
-
Click the Service Team tab.
-
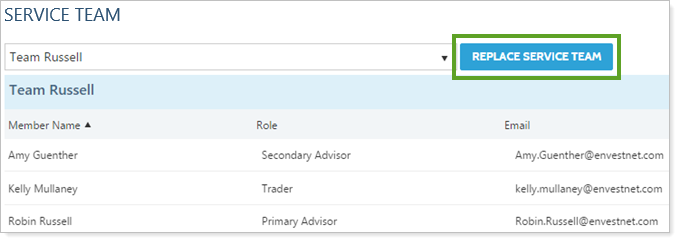
In the Select a Service Team box, start typing the name of the service team you want to assign for the Household. When you see the team in the list, click it and then click Replace Service Team. You can only assign one service team to a Household.
-
Click Save.
Change Service Team Assignments via multi-edit
To reassign a service team assigned to multiple households at once, you can perform a multi-edit as long as you assign the same service team to each household you select.
To reassign a service team using the multi-edit process:
-
On the Accounts menu, click Households.
-
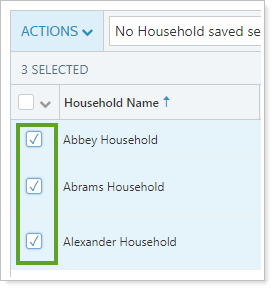
Select the households where you want to change the service team. All Households you select will need to be assigned the same service team.
-
In the Actions list, click Edit.
-
In the list of the Service team page that displays, choose the service team you want to assign to all selected Households and then click Add Service Team. This will replace any existing service teams assigned to the selected Households.
-
Click Save.
Assign a Service Team Via an Upload Data Set
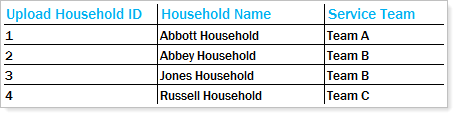
If you prefer to assign service teams through an uploaded data set, you'll want to upload the Household Information Data Set. The service team is defined in the Service Team column. An example data set is shown below:
Service Team Permissions
The following permissions are available for Service Team permissions. For details on setting up permissions, visit User Management.
> Setup | Service Team Roles
-
Add. Create a new service team role.
-
Save. Save and edit a service team role.
-
Delete. Delete a service team role.
> Setup | Service Team Generic Users
-
Add. Create a generic user.
-
Save. Save and edit a generic user.
-
Delete. Delete a generic user.
> Setup | Service Team
-
Add. Create a service team.
-
Save. Save and edit a service team.
-
Delete. Delete a service team.
Migration Plan
Advisors and client administrators will be removed later this year in a future release, so please plan accordingly.
Households will have a Service Team. A Service Team can consist of unlimited number of users associated to unique roles. This will replace advisor and client administrators, so we recommend setting up your service teams now so you're prepared when the features that leverage service teams are released.
Creating the Service Team Page for Your End Client Portals
For more information, visit Client Views - Service Team Page.