Contents

Introduction
Tamarac strives to provide a secure, powerful, and user-friendly platform that enhances your client service. To further protect your clients' data, we offer a variety of security measures.
-
When you send a portal activation email or a password reset email, your clients will receive a secure link that expires 72 hours after the link is generated.
-
We enhance login security to prevent unauthorized logins or account break-ins by allowing you to enable dual factor authentication to add another layer of security when clients log in.
-
We safeguard the security of our platform and your data stored on our servers by maintaining all data in secure data centers.

Login Security
Set Default Session Timeout for advisors or Clients
Default session timeouts for advisors is 480 minutes (8 hours) and for clients is 15 minutes. For clients, the timeout applies for the mobile app as well as for the desktop client portal.
For more information, see Session Timeouts.
Dual Factor Authentication (DFA)
You can enhance login security by requiring dual factor authentication upon login. Dual factor authentication requires the user to enter knowledge-based authentication like a password or a security question and enter a code sent to their mobile phone. This helps secure the login by requiring at least two independent credential checks.
With dual factor authentication, the user must have:
-
Username and password AND
-
Access to the mobile phone associated with the account.
For additional security, we offer the option to require security questions upon login as well.
For more information on dual factor authentication, see Require Challenge Questions or Mobile Phone Codes to Sign In (Dual Factor Authentication).
Manage Challenge Questions For Client Logins (Dual Factor Authentication)
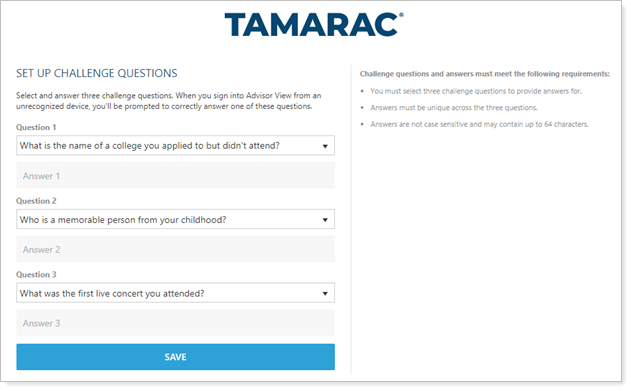
You can set dual factor authentication for each individual client, requiring them to enter a code sent to their mobile phone if they sign in from an unrecognized device. You can also require a security question upon login. You can set this option for clients in bulk.
Once enabled, clients will be required to select three challenge questions and provide the answers the first time they sign in, or enter a code sent to their mobile device. They will be able to set their computer as a trusted device so that they don't have to answer the questions or enter a code each time they log in on that device.
After the first successful login, clients will be able to set their computers as a trusted devices so that they don't have to answer the questions or enter a code each time they log in on that device.
For more information on dual factor authentication, see Require Challenge Questions or Mobile Phone Codes to Sign In (Dual Factor Authentication).
To enable dual factor authentication for your clients:
-
On the Accounts menu, click Clients/Client Portals.
-
Click the name of the client you want to enable dual factor authentication for.
-
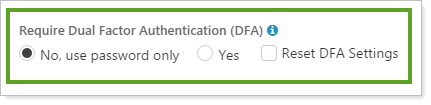
On the Client Portal panel, select Yes for Require Dual Factor Authentication (DFA).
NOTE
If you don't see this option, you will need to enable dual factor authentication for your firm in order to set it for your clients. You can enable dual factor authorization for your own account on the System Settings page.
-
Click Save.
Manage Mobile Phone Numbers for Receiving Security Codes
If your firm has implemented dual factor authentication, users in your firm and your clients can opt to receive a security code on their mobile phones to enter upon login.
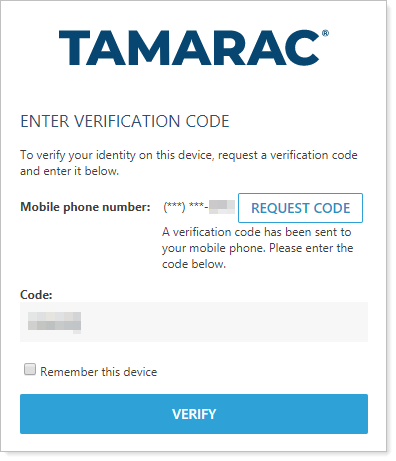
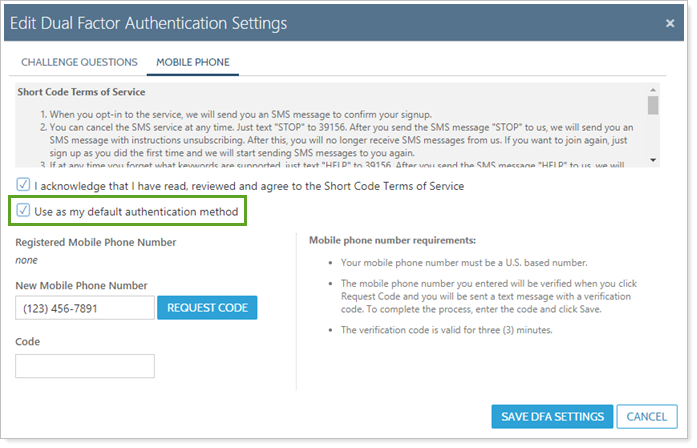
To use mobile phone codes instead of challenge questions, users can select the Use as my default authentication method check box on the Mobile Phone tab of the My Profile page. This is also where they can enter or update the phone number for receiving the codes.
If you would like to take advantage of this feature, please contact Tamarac Account Management at TamaracAM@envestnet.com.
Platform Security
As Software as a Service application, Tamarac maintains the infrastructure for the Tamarac suite of products. This means that Tamarac handles all the IT infrastructure, so you can focus on serving clients and growing your business.
Tamarac hosts its test and production systems at Rackspace Hosting data centers. Rackspace Hosting maintains the highest industry standards with SSAE16 Type II certification and undergoes annual audits.
For more information about data security with Tamarac, see Rackspace Hosting and Tamarac Data Security.
Password Security
Our password creation process, which includes sending an encrypted link with a set expiration date, is designed to prevent unauthorized parties from accessing your client's email and subsequently creating or changing their portal login password.
Both the password link and passwords you use to access the platform make use of an encryption technique known as hashing. With hashing, Tamarac's servers never actually store either the link or the password, only instructions on how to unscramble them when they are used.
For more information, see the following video:
Create Strong Passwords
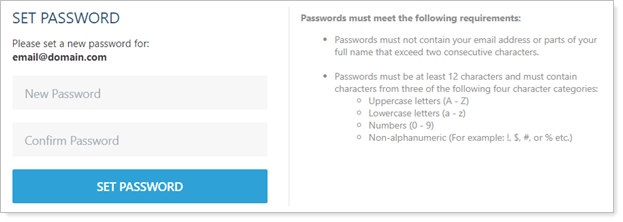
It is important to ensure that the password created adheres to strong password methodologies to protect from unauthorized logins. When you and your clients create passwords to access Tamarac products, you are required to create passwords with certain characteristics.
Passwords must meet the following criteria:
-
Passwords must not contain your email address or parts of your full name that exceed two consecutive characters.
-
Passwords must be a minimum of 12 characters.
-
Passwords and must contain characters from three of the following four categories:
-
Uppercase letters (A - Z)
-
Lowercase letters (a - z)
-
Numbers (0 - 9)
-
Non-alphanumeric ( !, $, #, %, etc. )
-
Our best practice is to create a password including multiple words that adheres to the requirements.
Activate a Client Portal (Set up Client Password)
Some firms prefer to activate client portals and enable the client with a password right away, while others prefer to set up the client portal and leave it deactivated until they meet with the client in person and discuss the settings.
You can handle new Client Portal password-related tasks:
-
For one client at a time on the Client Portal panel.
-
For multiple clients at a time on the Clients/Client Portals page.
Note
If the Enable Portal Access option is grayed out or disabled, it's because a Household hasn't been assigned to the client on the Client Profile panel. Clients must be assigned to a Household before you can activate their portals.
Activate One Individual Client Portal
If you are already in the client record, you can activate their portal from the Client Portal panel.
To activate a client portal:
-
On the Accounts menu, click Clients/Client Portals.
-
Click the name of the client you want to enable client portal access for.
-
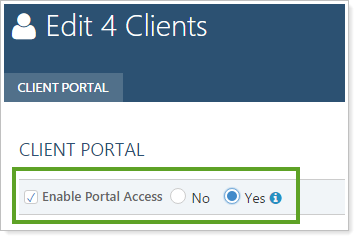
Click the Client Portal tab, and for Enable Portal Access choose Yes.

When you choose Yes to enable portal access, Send Activation Email is automatically selected.
Notes
-
Clear Send Activation Email to not immediately send the client an email notification with the activation link.
-
To send the activation email later, select Send Activation Email in the client record, or click Reset Password/Send Activation on the Clients/Client Portals page Actions menu.
-
Leave Send Activation Email selected to immediately send an activation email with an activation link to the client.
-
-
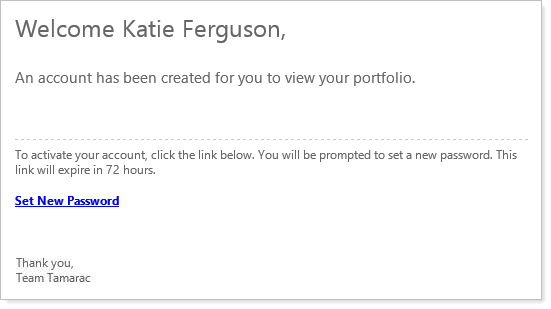
Click Save. When this change is saved, Advisor View sends the client an email with a link to the Set Password page. This link remains active for 72 hours.
Notes
If your client doesn't click the link within 72 hours, you can resend the password:
-
On the Client record, select Send Activation Email.
-
On the Clients/Client Portals page, select the client record(s) you want to resend. On the Actions menu, click Reset Password/Send Activation.
On the Clients/Client Portals page, the Authentication Link Expiration countdown timer tracks how much longer the link remains active.
-
-
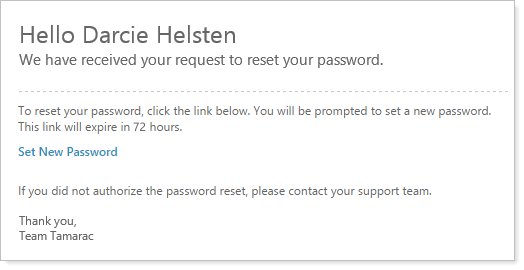
When your client clicks the Set New Password link, the Set Password page opens, where your client creates a new password.
Note
There is no disclaimer for clients to activate the portal. However, you can enable dual factor authentication for further portal security.
Activate Multiple New Client Portals
You can save time when you want to activate multiple new clients' portals by using multi-edit to activate them all at once.
To activate multiple portals at once:
-
Click Clients/Client Portals on the Accounts menu.
-
Select the check boxes next to the clients you want to enable client portal access for.
-
Under Actions, click Edit.
-
On the Client Portal tab, for Enable Portal Access, choose Yes. This enables portal access, but the activation email is not sent to your client. This allows you to review the client portal before the client sees it.
After reviewing the portal you can come back to the client record and select the Send Activation Email check box, or use multi-edit to send the activation email.
-
Click Save. When this change is saved, Advisor View returns to the Clients/Client Portals page with the clients you originally selected to enable access for still selected.
-
With those same clients selected, under Actions, click Reset Password/Send Activation.
-
In the Reset Password/Send Activation window, click Continue. Advisor View sends the clients an email with a link to the Set Password page. This link remains active for 72 hours.
If your clients don't click the link within 72 hours, you can resend the password. You can track how much longer the link remains active using the Authentication Link Expiration countdown timer.
-
Clicking the Set New Password link opens the Set Password page, where your client creates a new password.
Advisor Procedure to Reset or Resend a Client Password
There may be times when you activate a client's portal and the client is not able to create a password within the 72-hour timeframe. For example, if your client is on vacation, the link may expire before the email gets opened. Similarly, if your client forgets the portal password, you can easily resend an activation or reset link.
Each time you resend an activation email or password reset email to an individual client, the Authentication Link Expiration countdown timer resets. When you send multiple emails, only the most recent link sent remains active.
You can handle Client Portal password-related tasks:
-
For one client at a time on the Client Portal panel.
-
For multiple clients at one time on the Clients/Client Portals page.
Resend Password Link for One Client
If you are already in the client record, you can handle password-related tasks from the individual client's Client Portals panel.
To resend a password activation email or reset a password for an individual client:
-
Click Clients/Client Portals on the Accounts menu.
-
Click the name of the client you want to enable client portal access for.
-
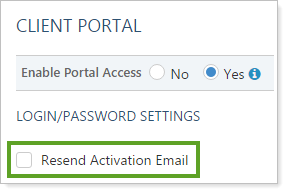
Click the Client Portal tab, then select Resend Activation Email. The name of the check box varies depending on the client's portal status, as does the email sent.
Note
This smart system sends a different automated email depending on the portal status.
Status Message Sent Inactive No email sent. To set up multiple clients with a portal initially, see Activate Multiple New Client Portals with Multi-Edit in Client Portal Security. Pending Advisor View sends the client email address on record a new activation email. Active Advisor View sends the client email address on record a password reset email. For more information about automated emails and email templates, see Customize the Automated E-mail Messages that Advisor View Sends.
-
Click Save. When this change is saved, Advisor View sends the client an email with a link to the Set Password page. This link remains active for 72 hours.
If your client doesn't click the link within 72 hours, you can resend the password multiple times. You can track how much longer the link remains active using the Authentication Link Expiration countdown timer.
Note
If your client can't find the automated email generated, you can suggest that the client:
-
Add the automated email address to their safe senders list.
-
Check their email spam folder.
-
-
Clicking the Set New Password link opens the Set Password page, where your client creates a new password.
Resend Password Links for Multiple Clients
You can quickly handle password-related tasks directly from the Clients/Client Portals page, without ever having to go into an individual client's record.
To resend a password activation email or to send a password reset email:
-
Click Clients/Client Portals on the Accounts menu.
-
Select the check box next to the client or clients you want to enable client portal access for. You can select one or more clients.
-
Under Actions, click Reset Password/Send Activation.

-
In the Reset Password/Send Activation window, click Continue. Advisor View generates an activation email or password reset email containing a new link for each client selected.
Note
This smart system sends a different automated email depending on the portal status.
Status Message Sent Inactive No email sent. To set up multiple clients with a portal initially, see Activate Multiple New Client Portals. Pending Advisor View sends the client email address on record a new activation email. Active Advisor View sends the client email address on record a password reset email. For more information about automated emails and email templates, see Customize the Automated E-mail Messages that Advisor View Sends.
Client Procedure to reset Their Own Password
Many clients are accustomed to resetting passwords themselves. The Advisor View password reset process should be familiar, so your clients can navigate the reset process themselves if desired.
For a client to reset his or her own password:
-
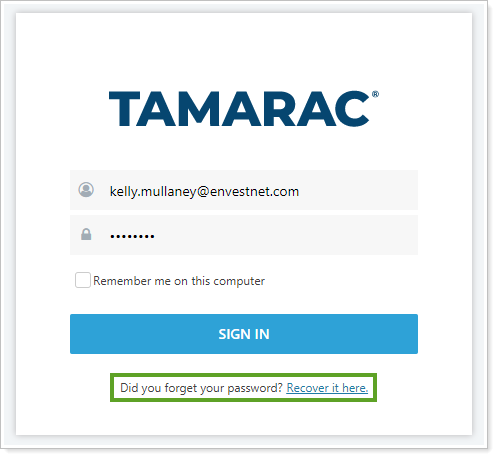
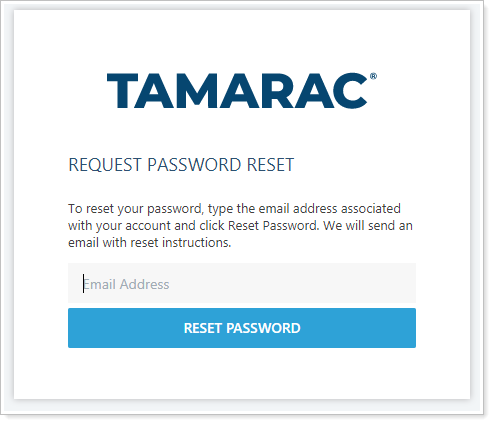
On the sign in page for your client portal, tell the client to click Recover it here.
-
The client is directed to the Request Password Reset page, where he or she enters the same email address that is associated with the client record in Advisor View.
-
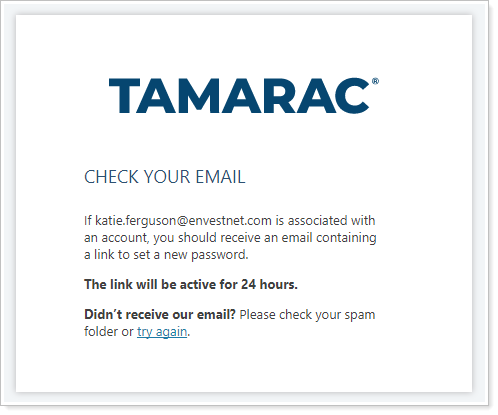
The client is directed to a confirmation page. If the email address entered matches the client record in Advisor View, the client receives an email with further instructions.
-
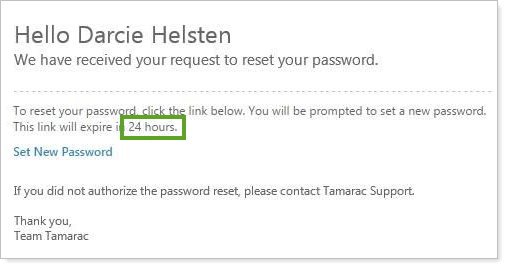
Advisor View sends the client an email with a link to the Set Password page. This link remains active for 24 hours, after which it deactivates.
If your client doesn't click the link within 24 hours, he or she can click the Recover it here link on the portal login page to initiate the reset process again.
You can track how much longer the link remains active using the Authentication Link Expiration countdown timer.
-
Clicking the Set New Password link opens the Set Password page, where your client creates a new password.
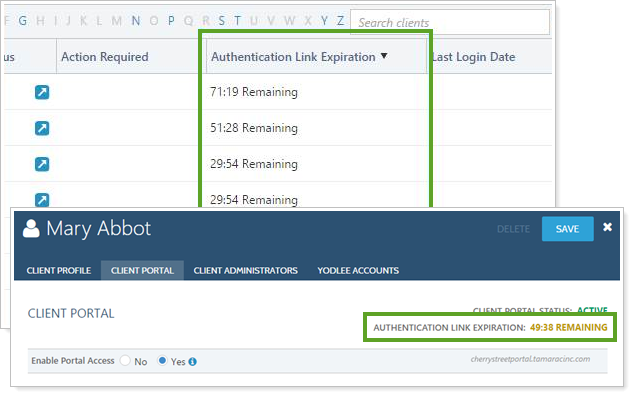
Track How Much Longer A Password Link is Active (Authentication Link Expiration)
When you enable a client portal or reset a client's password, the client has 72 hours to click the link in the automatic email before the link expires. You can keep track of how much time remains for each link using the Authentication Link Expiration countdown timer.
Each time you send a client a new password email, the Authentication Link Expiration countdown timer resets.
You will find the Authentication Link Expiration countdown timer on the Client Portal panel and on the Clients page as a column.
You can sort the Authentication Link Expiration column on the Clients/Client Portals page to find all clients with outstanding links and see which ones may need a reminder or a new link sent.
Note
The Authentication Link Expiration countdown timer only appears on the Client Portal panel for clients with pending or active portal status.
Deactivate a Client Portal
You can use the Enable Portal Access option to deactivate a portal—for example, as part of a client offboarding workflow.
By setting the Enable Portal Access option to No, you'll remove the client's access, and they won't be able to sign in. Disabling access will not remove any files, announcements, reports or any other information. You can re-enable access at any time and the portal will be exactly as it was previously.
For more information about deactivating a portal, see Disable Client Portal Access for a Client.
Mobile App Login Options
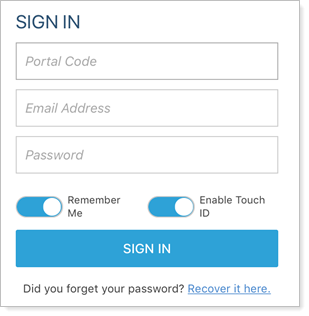
The mobile app offers the following login options:
-
Username and password
-
Fingerprint authentication
-
Facial recognition authentication
You can layer levels of security for the mobile app. This means that you can require dual factor authentication in addition to the client logging in using a fingerprint ID.
To learn more about the mobile app, see Learn More About the Tamarac Mobile App.
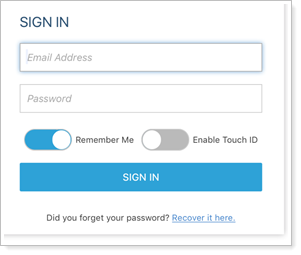
Username and Password
-
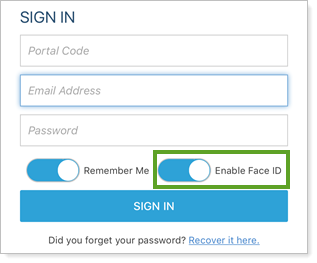
For standard app: Enter the portal code and their desktop portal username and password. Tap Sign In.
Note
After the first log in, if Remember Me is selected, the portal code is saved and that field is auto-completed for future logins.
-
For premium app: Enter the desktop client portal username and password. Tap Sign In.
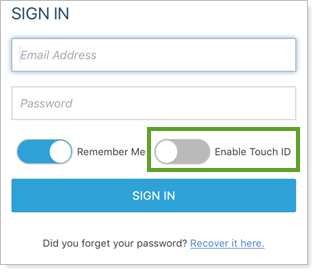
Fingerprint Authentication (Touch ID)
For both standard and premium apps, the user can enable fingerprint ID to enable fingerprint-based authentication, if the user's mobile device supports it.
Facial Recognition Authentication (Face ID)
For both standard and premium apps, users can enable Face ID for facial recognition authentication, if the user's mobile device supports Face ID.