
FebContents
|
|

Dynamic Reports vs. PDF Reports
An overview of each report type is as follows:
-
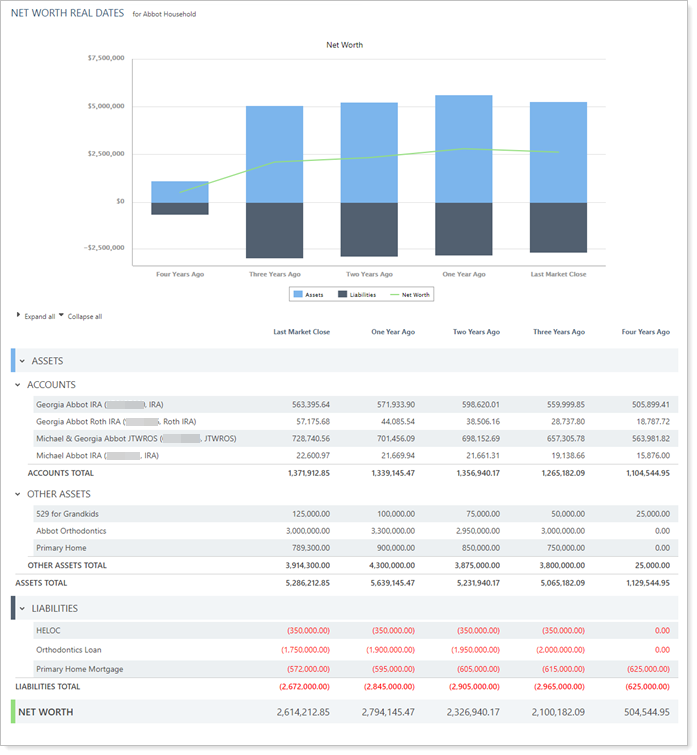
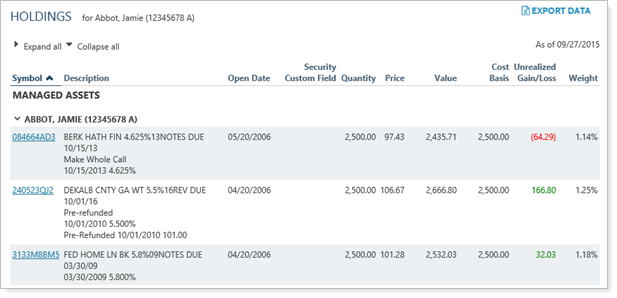
Dynamic "on-screen" Reports. Point-in-time snapshots of portfolio holdings and accounts, as of the previous market close date. These reports are formatted for on-screen viewing and are not ideal for print distribution. You can access the dynamic reports from the Reports menu.
-
PDF Reports. PDF reports are used for internal and client-facing use and are optimized for printing. You can customize the look of PDF reports to create meaningful reports that strengthen your firm’s brand. These reports are ideal for printing or for quarterly statements. You can access PDF reports from the PDF Templates menu.

The easiest way to think about dynamic reports is that they're meant for on-screen viewing and that PDF reports are meant for printing and sending to clients as quarterly/annual statements.

Running Dynamic Reports
To run a dynamic report:
-
On the Reports menu, click the report you want to view. The report will appear on your screen.
-
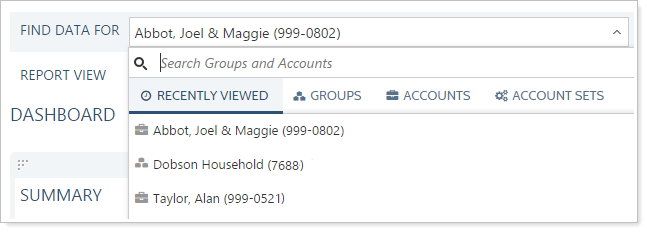
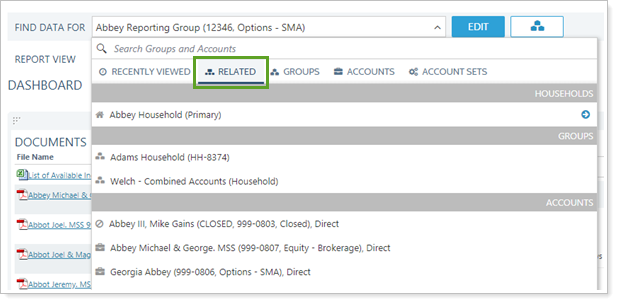
Use the Find Data For list to select the record you want to run the report on.
-
In the Find Data For list, choose the record that you want to run the report on. The 250 most recently viewed records are displayed. You can click on the tabs to filter them by type.
-
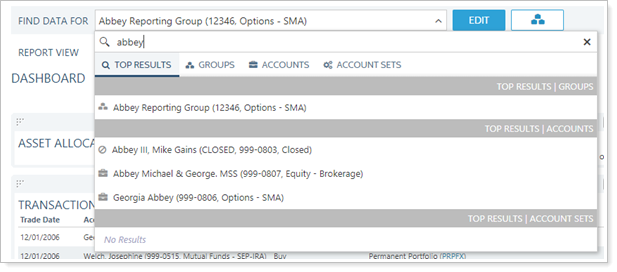
If you know the name or number of the account, group, Household, or account set you want to run the report on, type it in the Search Groups and Accounts box. The search dynamically updates, refining results as you continue typing.
-
If you want to view a record for accounts, groups, or Households related to the current search, click the Related tab. Select the desired record.
-
If you want to view the report for all accounts, in the Find Data For list, search for All Accounts.
-
-
From the Report View list, choose the view you want to use.
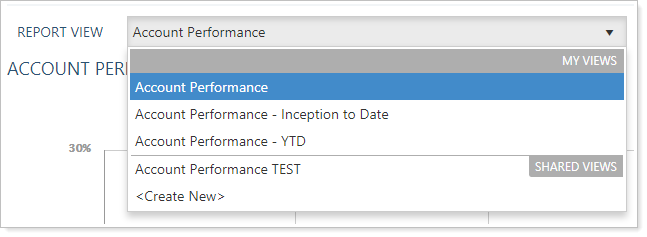
You can change the report view at any time while still seeing the same account or group by choosing a new view from the Report View list. For more information on creating report views, see Dynamic Report Views.
Running PDF Reports
You can generate a PDF performance report from within Advisor View. To run the report, you must first create a report template. For details on creating the PDF report template, visit Learn More About PDF Reports and Templates.
You can choose a variety of delivery methods once a PDF report is generated.
Household vs. Account/Reporting Group PDF Reporting
You can run PDF reports at the Household and account/reporting group levels. The behavior of the reports changes, depending on where you run the reports.
Here are some of the common differences between running reports at the different levels:
-
When generating reports at the Household level, Advisor View will create a separate PDF report for each account/group assigned to the Household. Advisor View will not combine all reports into a single PDF.
When generating reports at the account/reporting group level on the Accounts page—if you choose Post or Download & Post as the preferred delivery method—a PDF report will be posted to every active client portal in all households where that account is a member, is enabled for PDF reporting, and where the client portal’s portal settings indicate Post or Download & Post as the preferred delivery method.
-
When generating reports at the Household level, you have the option to override the address of each assigned account/reporting group with the address of the Household. For details, see the option Override Addresses of Direct Member Accounts on Create and Maintain Households: The Settings Panel.

-
When generating reports at the Household level, you have the option to prevent Advisor View from generating a PDF report for an account or reporting group assigned to the Household. For details, see Do Not Generate a PDF for an Account or Group in a Household.
-
When generating PDF reports at the Household level, Advisor View will group the reports into a ZIP file. You can control the number of files in each ZIP file with PDF batch size options. For more information, see PDF Batch Size.
-
When generating PDF reports at the Household level, you can exclude an account or group for net worth. For more information, see Do Not Include An Account or Group in Net Worth for a Household.
Running PDF Reports for Households
To generate a PDF report for a Household:
-
On the Accounts menu, click Households.
-
Select one or more Households that you want to generate a PDF report for.
tip
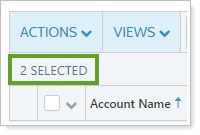
Review the number in the heading row of the table to verify how many Households are selected.
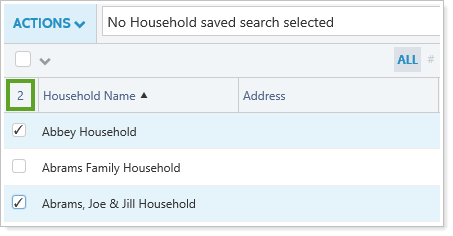
This quick check ensures that you are running reports for only the expected Households, and not for any Households that may have already been selected on the page.
-
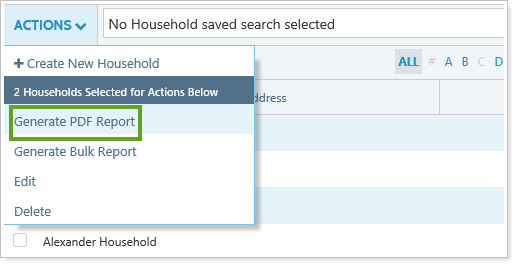
In the Actions list, click Generate PDF Report.
-
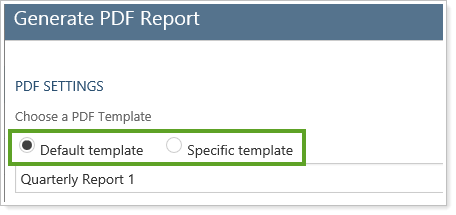
Choose one of the following on the Generate PDF Report screen:
-
Default template. You can assign default templates to your accounts and reporting groups. Choose this option to generate your reports using each account's default template. If you select this option, choose the template type you want to use for the report. For more information on assigning default templates, visit Assign Default Templates Using PDF Template Types.
-
Specific template. Choose this option to generate a report for a specific template.
-
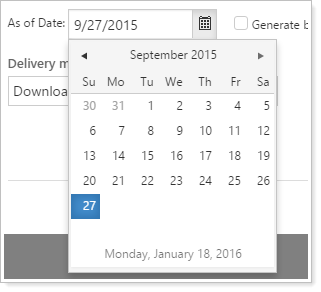
Click the As of date box. In the calendar that appears, click an end date for the report. This date will be used on all accounts and households you selected.
-
In the Delivery method list, click Download Reports. If you want to learn how to post PDF reports to a client portal, visit Post a PDF Report to a Client Portal. For more information on setting the default delivery method for each client, visit Assign a Default Report Delivery Method.
-
Click Generate Report. If you generated only a report for only one account, the report will appear on your screen. If you generated a report for more than one account, Advisor View generates the reports on the PDF Report Status page.
tip
We recommend clearing the check boxes for all selected Households after the reports have been generated. This process helps prevent accidentally posting the wrong reports to the wrong clients in subsequent report generation.
-
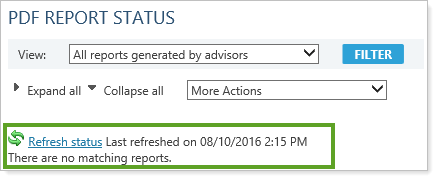
On the PDF Report Status page, Completed will appear in the Status column when Advisor View is finished generating the reports. If you selected a large number of accounts, processing may take a few minutes. If Advisor View is not finished generating the report, Processing will appear in the Status column. To update the status of the report, click the Refresh Status link at the top of the page.
-
When the Status column changes to Completed, click the “>” next to the report you want to view and then click the “>” next to Reports.

-
Click the link next to Download reports. In the Save As dialog, choose a location to save the ZIP file, and then click Save. When the download is complete, double-click the file you saved. A compressed folder will open.

-
Double-click the report file you want to view, and a PDF report appears on your screen. You need Adobe Reader or Adobe Acrobat to view the reports.
Running PDF Reports for Accounts and Reporting Groups
To generate a PDF report for an account or reporting group:
-
On the Accounts menu, click Accounts.
-
Do one of the following:
-
If you know the name or number of the account you want to run the report on, type it in the Search accounts box, and then click Search. When searching for accounts, Advisor View will return results for groups where one or more of the underlying accounts meets the criteria you specify. For example, if you search for Kelly, Advisor View will return results for the group Mullaney Household if Kelly is an underlying account.
-
If you want to view the report for all accounts, in the Find data for list, click All Accounts.
-
-
Select one or more accounts or reporting groups that you want to generate a PDF report for.
tip
Review the number in the heading row of the table to verify how many accounts and reporting groups are selected.
This quick check ensures that you are running reports for only the expected accounts and reporting groups, and not for any that may have already been selected on the page.
-
In the Actions list, click Generate PDF Report.

-
In the Generate PDF report for list, choose one of the following:
-
Default template. You can assign default templates to your accounts. Choose this option to generate your reports using each account's default template. If you select this option, choose the template type you want to use for the report. For more information on assigning default templates, visit Assign Default Templates Using PDF Template Types.
-
Specific template. Choose this option to generate a report for a specific template.
-
Click the As of date box. In the calendar that appears, click an end date for the report. This date will be used on all accounts and households you selected.
-
In the Delivery method list, click Download Reports. If you want to learn how to post PDF reports to a client portal, visit Post a PDF Report to a Client Portal. For more information on setting the default delivery method for each client, visit Assign a Default Report Delivery Method.
-
Click Generate Report. If you generated only a report for only one account, the report will appear on your screen. If you generated a report for more than one account, Advisor View generates the reports on the PDF Report Status page.
tip
We recommend clearing the check boxes for all selected accounts and reporting groups after the reports have been generated. This process helps prevent accidentally posting the wrong reports to the wrong clients in subsequent report generation.
-
On the PDF Report Status page, Completed will appear in the Status column when Advisor View is finished generating the PDF reports. If you selected a large number of accounts, processing may take a few minutes. If Advisor View is not finished generating the report, Processing will appear in the Status column. To update the status of the report, click the Refresh Status link at the top of the page.
-
When the Status column changes to Completed, click the “>” next to the report you want to view and then click the “>” next to Reports.
-
Click the link next to Download reports. If you are generating a report for more than one account, Advisor View will create a ZIP file that contains the reports you generated.
-
If you generated reports for more than one account, in the Save As dialog, choose a location to save the ZIP file, and then click Save. When the download is complete, double-click the file you saved.
-
Double-click the report file you want to view, and a PDF report appears on your screen. You need Adobe Reader or Adobe Acrobat to view the reports.