Contents
Introduction
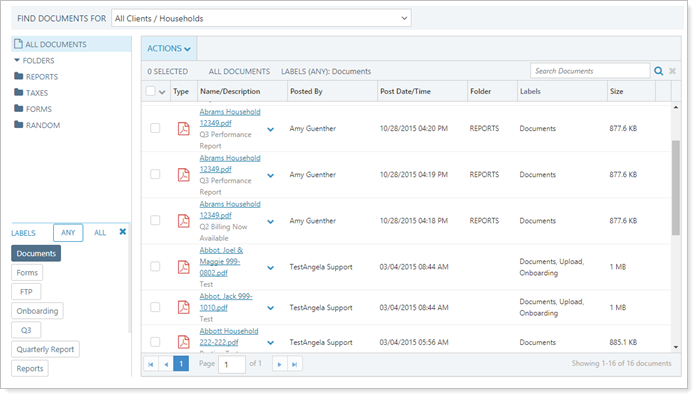
The document vault is built for sharing files with clients. Although you don't generate files within the document vault, you can use the document vault to:
-
Manage file name, description, folder and label assignment, and more,
-
Preview files without downloading,
-
Delete or edit files,
-
And more.
Upload or Post a File
The document vault provides you with a secure and easy way to share files with your clients. When you post a file to a client's document vault, you can choose to notify them by email, with an announcement on the Client Portal dashboard, or both. Once you post a document to the document vault, Advisor View will never automatically delete it. All uploaded files will remain in Advisor View until you delete them.
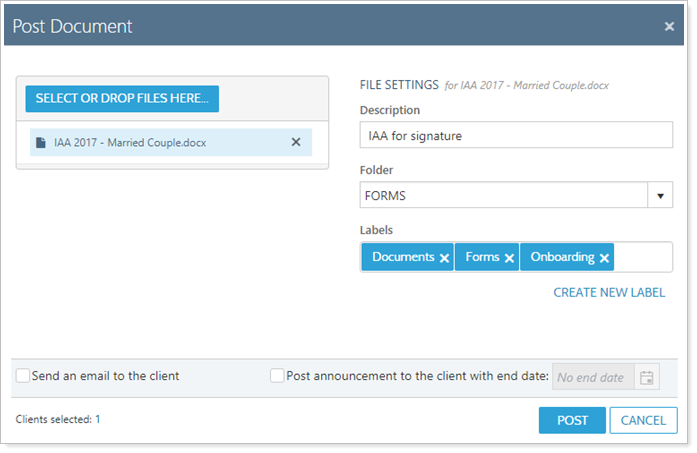
For details on how to post one or more documents or PDFs, see the following topics:
You can also allow or prevent your clients from posting to the document vault. See Allow or Prevent Clients From Uploading Document Vault Files for more information.
Preview a File
You can preview documents in the document vault to see what they are without downloading.
To preview a document vault file, you can do either of the following:
-
In the document vault, click the name of the file.

-
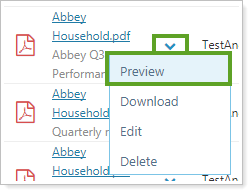
In the document vault, click ˅ next to the file name and click Preview.
When previewing a file, the following are some of the features are available:
| Icon | Feature |
|---|---|

|
View thumbnails of all pages in the file. |

|
If the file has an outline included, you can see that in the left navigation pane. |

|
Print the file directly from preview. |

|
Download the file directly from preview. |

|
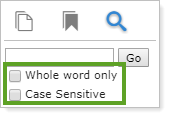
Search the file. You can designate whether the whole word must match and whether the search should be case-sensitive.
|
In addition to these features, you also have standard previewing features such as zooming, scrolling, text selection, control over page display, and more.

When you're done previewing the file, make sure to click  to close the preview and return to the document vault.
Delete a File
If your user has permissions, you can delete files from the document vault. Although clients can view documents if their client portal has the Document Vault page, they can't delete documents from their client portal.
For more information about deleting files, see Add or Remove Document Vault Files.
Edit a File
If you upload a file and then notice something wrong with it, you can update the file within the document vault. When you update a document, you can choose to alert clients by email, with a dashboard announcement, or send no alert.
To update the document:
-
Under Documents, click Vault.
-
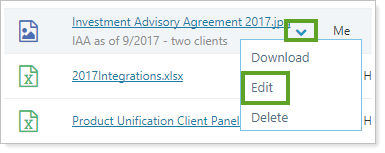
For the file you want to review, click ˅ and then click Edit.
-
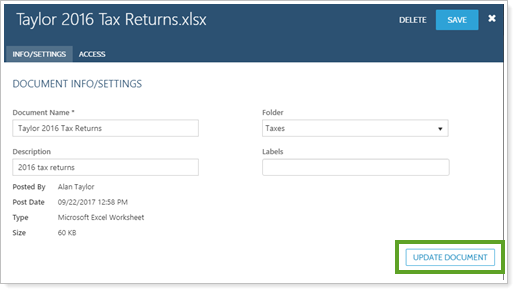
In the Edit panel for the file, click the Info/Settings tab.
-
Click Update Document. Complete the applicable document posting settings.
-
Click Save.
Edit a File Name and Description
To change the name or description of a file once it has been uploaded:
-
Under Documents, click Vault.
-
For the file you want to review, click ˅ and then click Edit.

-
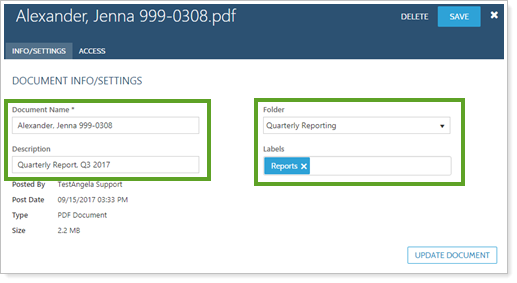
In the Edit panel for the file, click the Info/Settings tab. Type in the new name in Document Name or the new description in Description. You can also edit folder and labels on this panel.
-
Click Save.
Download One or More Files
To download multiple files from the document vault at the same time:
-
Under Documents, click Vault.
-
Select the check box next to the files you want to download.
-
In the Actions list, click Download.
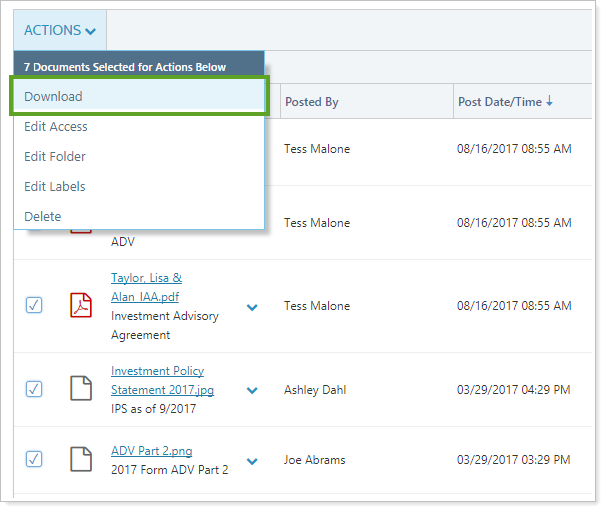
The files will all be downloaded to your computer in a compressed (.zip) folder.
Share an Existing File With a New Client
In some cases, you may have an existing document in your vault that you want to share with another client. Instead of re-uploading the document, you can simply grant that client access to the document.
To grant new clients access to a document already posted in the document vault:
-
Select the check box next to the document or documents to be shared.
-
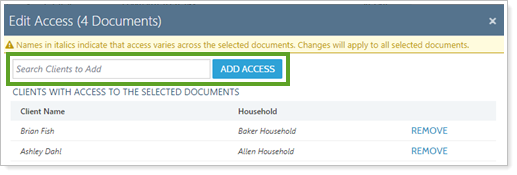
Under the Actions list, click Edit Access.
-
In the Search Clients to Add field, type the name of the client you want to add and click Add Access.
Note
Only the first letters of the client's first name are searched. For example, when adding Georgia Abbey, if you search for Abbey and get no results, try searching for Georgia.
-
Click Close.


