
Contents
|
|

Introduction
Advisor View is more than simply a tool to generate and share reports. The document vault is a secure cloud-based file storage system that provides a convenient method for securely sharing all sorts of other files with one client, several clients, all current clients, or even all future clients at once—and for clients to share files with you. This capability is designed to enhance your traditional means of client communication to help create a better overall client experience.
Your clients use the client portal document vault to access the documents and PDF reports that you post.
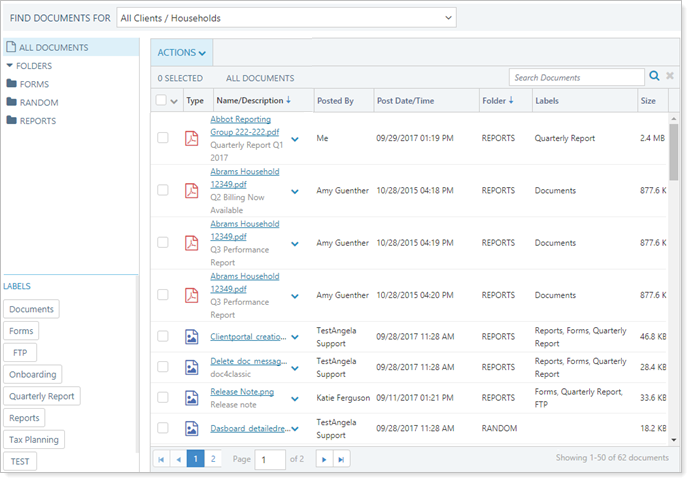

Generate and Post a PDF Report to a Client Portal
To post a PDF report to a client portal:
- On the Accounts menu:
- Click Accounts if you want to run a report at the account or reporting group level.
- Click Households if you want to run the report at the Household level.
- Select one or more accounts/groups/Households that you want to generate a report for, and in the Actions list, click Generate PDF Report.

-
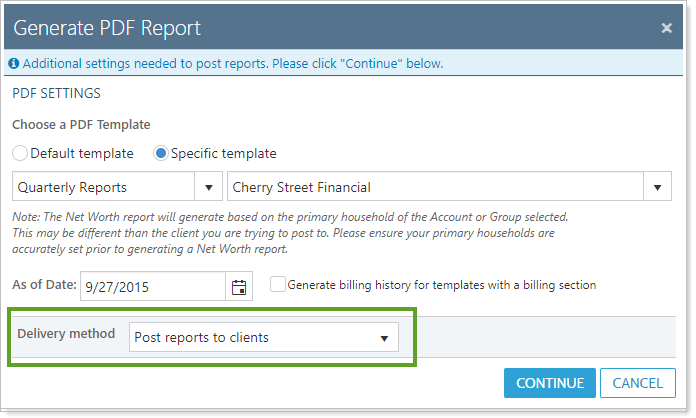
Designate what PDF template to use for the report with the Choose a PDF Template option:

-
Click Default template to assign a default PDF template to each account or group and generate the default template, then choose a template from the drop-down list. You can find more information about default templates at Assign Default Templates Using PDF Template Types.
-
Click Specific template to choose another template, then select the template type and then specific template in the drop-down lists. You can find more information about PDF report templates at Create and Edit a PDF Template.
-
-
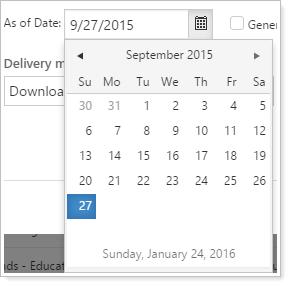
Click the As of date box. In the calendar that appears, click an end date for the report. This date will be used on all accounts and households you selected.
-
In the Delivery method list, click Post reports to clients. When you choose this option, additional configuration options appear.
-
Click Continue.
- Complete the following configuration options, as appropriate:
- ALL ACCOUNTS. Ensures the report is posted to the client’s portal only if the client has access to all accounts within a group.
- AT LEAST ONE ACCOUNT. Advisor View will post the report for the group to the client if the client’s portal account access allows them to see even just one account associated with the group.
- Click Generate and Post Reports.
If you post a report to only one portal, the following message will appear at the top of your screen.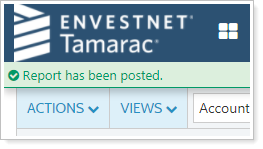
If you post the report to more than one client portal, you can see the reports on the PDF Report Status Page.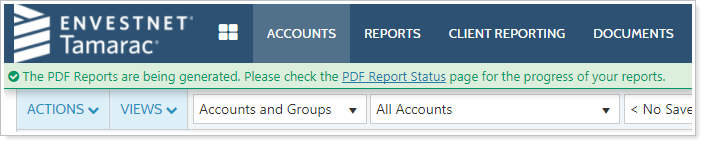
If Advisor View is not finished generating the report, Processing will appear in the Status column. To update the status of the report, click the Refresh Status link at the top of the page. When Completed appears in the Status column, processing is complete.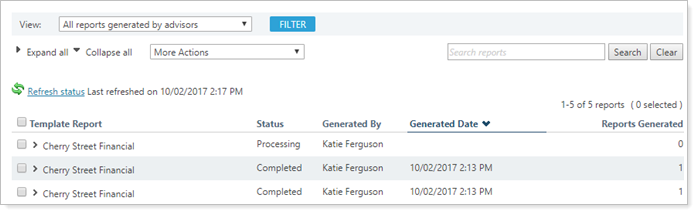
| Setting | More information |
|---|---|
| File Description |
Type the description for the file; this communicates to your client the nature of the posted document. This text is fully searchable. While the description is optional, it is important to provide context about the purpose of the document. Your client may see a large number of documents posted, and it’s important for them to know what exactly it is and why you posted it. |
| Folders | For higher-level or broader file organization, choose a folder from the list of existing folders to file the report in. The report can only be stored in one folder at a time. For more information on folders, see Manage Folders. |
| Labels | Choose a label or labels for the report to help organize files more specifically. You can also create a new label on the spot if none of the existing labels apply. For more information on labels, see Manage Labels. |
| Post reports to clients with access to |
If you are creating a report for a group, select the level of access that a client must have to see the report posted to their portal. |
| Send notification email to users |
Select this check box if you want clients to receive an email announcement along with the posted document. For more information on customizing the emails that Advisor View sends, visit Customize the Automated Email Messages that Advisor View Sends. |
| Post announcement with end date |
Select this check box if you want the client to see an announcement notification on his or her portal dashboard. In the end date box, choose the date when the announcement will be removed from the client portal. If you leave this field blank, no end date will be used and the client will need to manually remove the announcement. In most cases, it's best to specify an end date. For more information on announcements, visit Announcements. |
Post an External Document to a Client Portal
There are two ways you can share external documents such as Word documents, custodial forms, and tax files securely via the client portal: through the menu and using Post From FTP.
To post a batch of multiple files at once, see Post From FTP.
To post a document to your clients through the Advisor View menu:
-
On the Accounts menu, click Client/Client Portals.
-
Select one or more clients you want to post a document for, and on the Actions list, click Post Document.
If you select more than one client, Advisor View alerts you that multiple clients are selected. This helps protect against inadvertently sharing files with the wrong clients. Click Continue.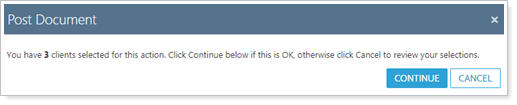
-
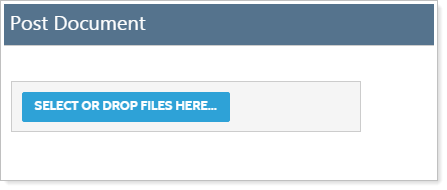
Click Select or Drop Files Here. When you have located the file you want to post, click it, and then click Open. Alternatively, you can drag-and-drop files onto the Select or Drop Files Here box.
-
In the expanded file upload area, complete the following fields, as appropriate.
Repeat the process for all the different documents you want to post.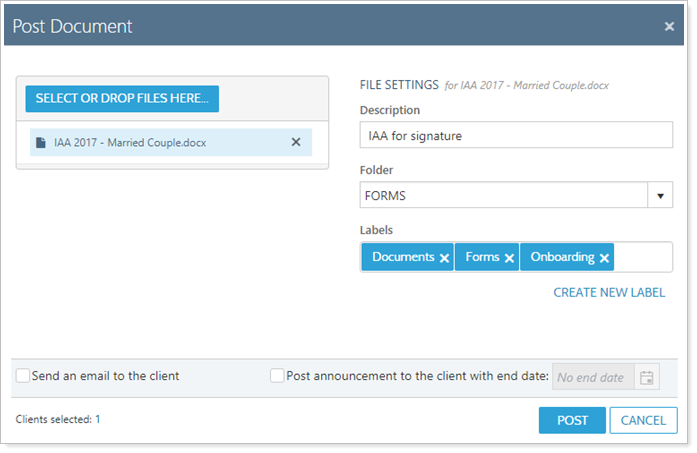
Setting More information File Description Type the description for the file; this communicates to your client the nature of the posted document. This text is fully searchable.
While the description is optional, it is important to provide context about the purpose of the document. Your client may see a large number of documents posted, and it’s important for them to know what exactly it is and why you posted it.
Folders For higher-level or broader file organization, choose a folder from the list of existing folders to file the report in. The report can only be stored in one folder at a time. For more information on folders, see Manage Folders. Labels Choose a label or labels for the report to help organize files more specifically. You can also create a new label on the spot if none of the existing labels apply. For more information on labels, see Manage Labels. Send an email to the client Select this check box if you want clients to receive an email announcement along with the posted document.
For more information on customizing the emails that Advisor View sends, visit Customize the Automated Email Messages that Advisor View Sends.
Post announcement with end date Select this check box if you want the client to see an announcement notification on his or her portal dashboard.
In the end date box, choose the date when the announcement will be removed from the client portal. If you leave this field blank, no end date will be used and the client will need to manually remove the announcement. In most cases, it's best to specify an end date.
For more information on announcements, visit Announcements.
Also post to all future clients To share a document with all future clients, see Post to All Future Clients. You will only see the option to share with all future clients when all current clients are selected to receive the file.
- When you're finished adding documents, click Post.
Notify Clients When a File is Posted
You can use any of three methods for notifying clients you have shared files with them using the document vault:
-
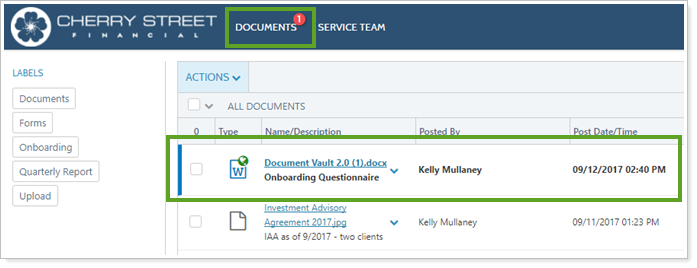
CLIENT PORTAL BADGE. After you post a PDF report or document to share with a client, when the client logs in to the client portal, a red badge on the Documents tab alerts the client to the presence of a new file. New files are marked in bold.
-
EMAIL NOTIFICATION. You can also choose to notify clients by email when documents are posted to portals. To send a notification email, in the Post Document window, select Send an email to the client.
For more information about notification emails, see Customize the Automated E-mail Messages that Advisor View Sends.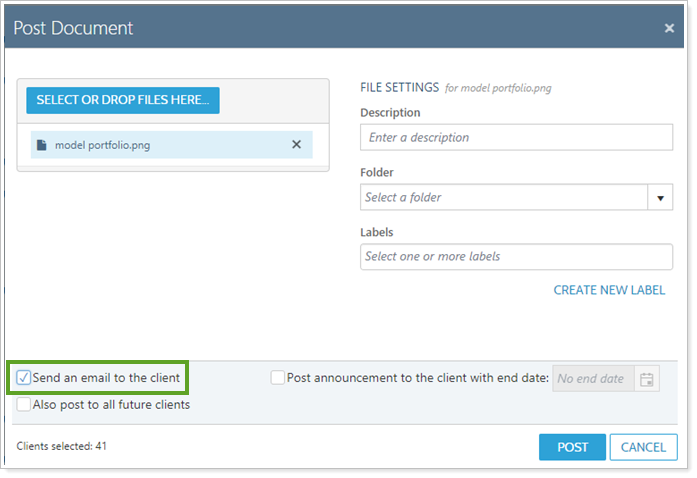
-
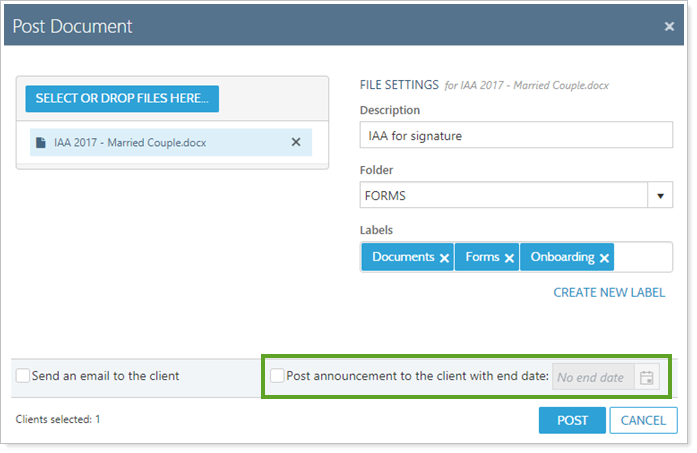
CLIENT PORTAL ANNOUNCEMENT. Announcements appear as notifications on the menu bar so they're easily visible as soon as your client signs in and on all pages in Advisor View. To use an announcement, in the Post Document window, select Post announcement to the client with the end date: and set an end date, if desired. For more information, see Client Portal Announcements.
Prevent PDF Reports from Being Posted to a Client Portal
If you want to prevent PDF reports from being posted to a client portal:
-
On the Accounts menu, click Clients/Client Portals.
-
Click the name of the client that you do not want receiving PDF reports via the document vault.
-
On the Client Portal panel, in the Preferred delivery method list, click Download.
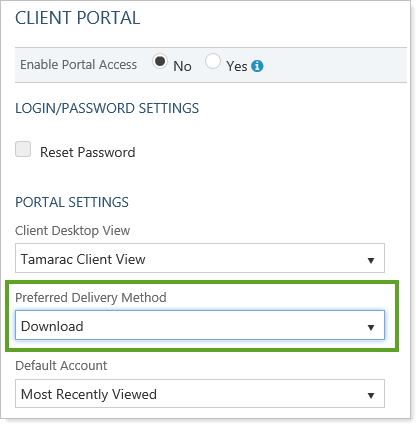
-
Click Save.
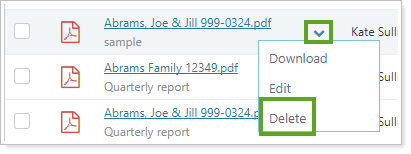
Delete a File Posted to a Client Portal
You can quickly delete files individually using files's actions list. Click ˅ next to the file name and then click Delete.
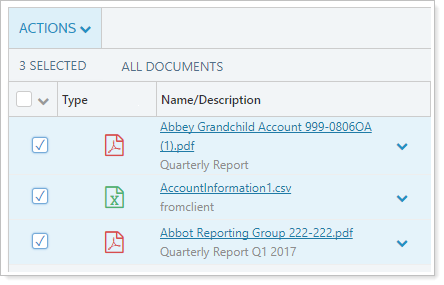
To delete one or more files from the document vault:
-
Under Documents, click Vault.
-
Select the check box next to the file or files you want to delete. You can delete multiple files at once.
-
In the Actions list, click Delete.
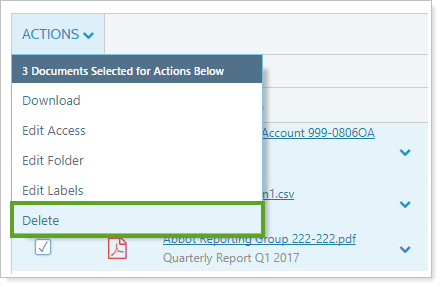
-
In the Delete Documents box, click Delete. This will delete the file from your vault as well as the client's vault.
For more information on the document vault, see Use the Document Vault.