Back

Workflow: Create Groups With Uploads

Contents

Introduction

Workflow Steps: Create Groups With Uploads

After Creating Groups

Additional Resources


Introduction

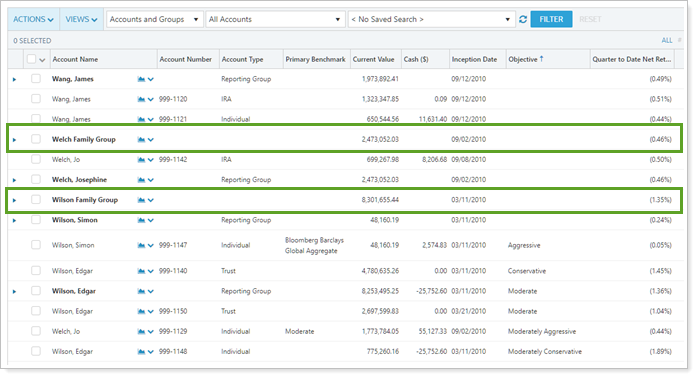
This workflow provides the steps for creating new groups and adding accounts to groups in bulk in Advisor View.

Learn more with this step-by-step video:

Workflow Steps: Create Groups With Uploads

1.

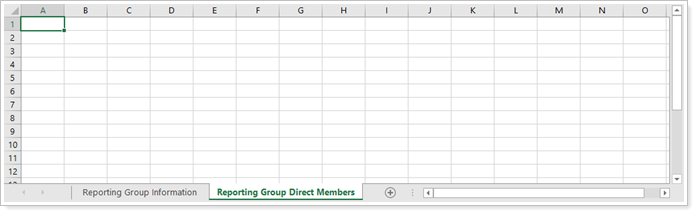
Review Data Sets and Create Upload Files

To prepare the data for upload, create a blank spreadsheet for each of the following upload data sets:

Upload Name What it Does Details
Reporting Group Information Creates a new group and allows you to configure its settings.

Must include either the Description column or First Name and Last Name columns to successfully create a new group.

Designate a numeric Upload New Group Account ID for each new group to link accounts with the new group.

Reporting Group Direct Members Adds accounts to the new group. Use the Upload New Group Account ID and Account Number fields to add accounts to the new group.


2.

Export Existing Data

To export existing data:

  1. In Tamarac, generate an Account Information bulk report to export data from all the accounts you want to add to groups. Include the Account Number, First Name and Last Name, and any other fields you want to use to configure group settings.

  2. Open the Account Information bulk report on your computer.

  3. In the Account Information spreadsheet, add and populate a Description column or First Name and Last Name columns for each account. These will become the description or first and last name for the new groups.

For information about account settings, see Maintaining Accounts in Advisor View. For information about group settings, see Creating and Modifying Reporting Groups.

For more information about running bulk reports, see Bulk Reports.

3.

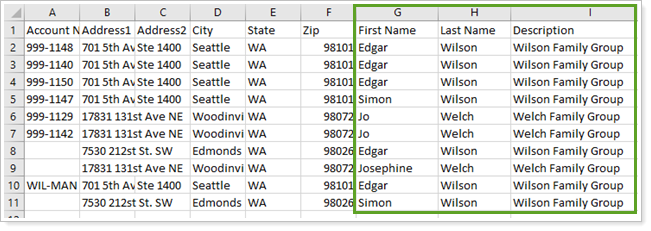
Use the Existing Data to Populate the Upload Files

To prepare the upload data sets:
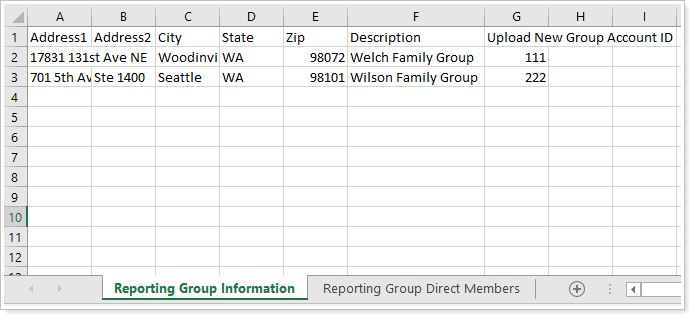
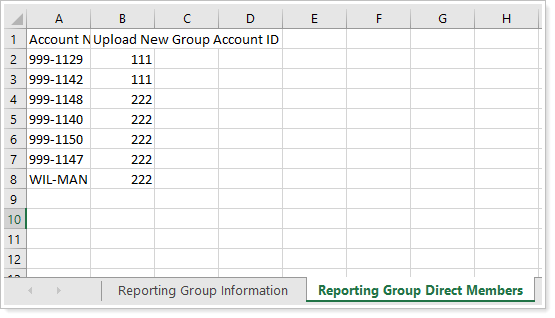
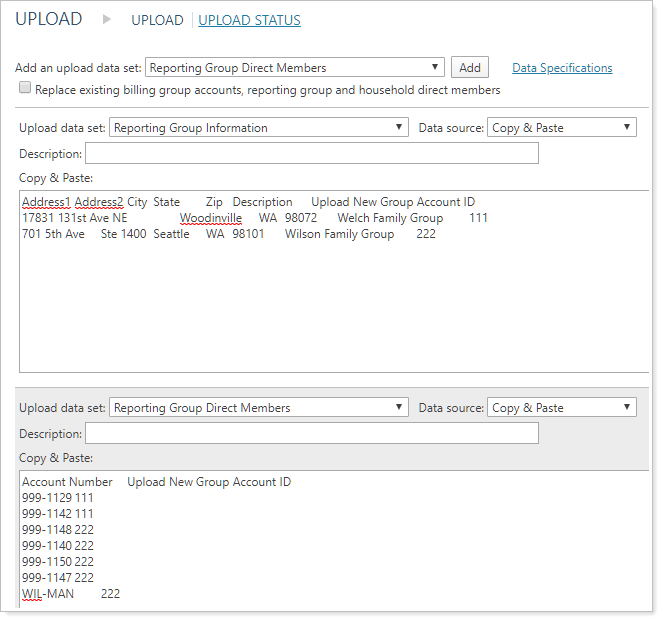
  1. In the Reporting Group Information upload data set spreadsheet:

    1. Paste the Description or First Name and Last Name columns from the Account Information bulk report, along with any other group settings you want to configure. For information about group settings, see Creating and Modifying Reporting Groups.

    2. Remove any duplicate rows.

    3. Add a new Upload New Group Account ID column and assign a unique numeric ID to the accounts that will go in each group.

  2. In the Reporting Group Direct Members upload data set spreadsheet:

    1. Paste the account numbers that you want to organize into groups from the Account Information bulk report.

    2. Enter the corresponding Upload New Group Account ID for each account. This links the account numbers with the new groups created in the Reporting Group Information upload.

Example

In the Reporting Group Information upload data set, the Welch Family Group is assigned an Upload New Group Account ID of 111. The Wilson Family Group is assigned an Upload New Group Account ID of 222.

In the Reporting Group Direct Members upload data set, all Welch accounts are assigned an Upload New Group Account ID of 111. All Wilson accounts are assigned an Upload New Group Account ID of 222. This ensures all Welch accounts are matched with the Welch group and all the Wilson accounts are matched with the Wilson group.

Best Practice

Review the Upload New Group Account IDs assigned to each account and confirm they belong to the correct group before doing the upload.

4.

Upload the Upload Files

In Tamarac, on the Uploads page, create two new upload data sets in this order:

  1. Create a Reporting Group Information upload data set. Use it to upload the data from your Reporting Group Information spreadsheet. This creates the new groups and configures the settings as you designate.

  2. Create a Reporting Group Direct Members upload data set. Use it to upload the data from your Reporting Group Direct Members spreadsheet. This adds accounts to the new groups.

  3. Click Upload.

Best Practice

Consider uploading one group’s worth of data to start with to confirm the spreadsheets are set up correctly.

For more information on creating an upload, see Bulk Data Uploading.

5.

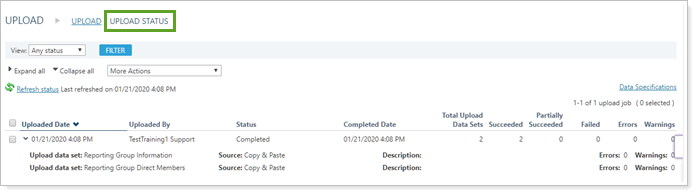
Confirm the Upload and Review Errors

Confirm the upload and troubleshoot any errors on the Upload Status page. For more information, see Bulk Data Uploading.

After Creating Groups

Once you've added accounts to groups, you can add the groups to Households, display them in the client portal, and start running reports based on groups. For more information, see:

Additional Resources

Learn more about: