
Contents
|
|

Introduction
The Users section of the User Management page allows you to change settings and assign roles for individual users within your firm. Each person in your firm who can log into Advisor Rebalancing is considered a user. Since different people in your firm perform different tasks, individual users can be granted or denied access to different parts of Advisor Rebalancing.

The difference between a user and a role is that a user is specific person and a role is a set of pages and actions that a person assigned to that role is able to access or perform. For example, your firm employs John who is a CSA. John is the user and CSA is your firm's defined role that lists what pages and actions John has access to within Advisor Rebalancing.

Set Access for a User
At the individual user level, you can change several settings and permissions related to that user. The following are ways you can customize access for individual users in your firm.
Create a User
At this time, users are not created directly in Advisor Rebalancing. To add a new user to Advisor Rebalancing, contact Tamarac service and request that a new user be created.
Grant a User Access to All Accounts
You can easily grant a user access to all accounts. That means that the user will be able to see all accounts within your firm, but this doesn't necessarily mean that user will be able to make changes to any of those accounts. Generally, only account administrators are given access to all accounts. However, in some instances, you can grant a user access to all accounts in your firm.
For more information on limiting a user's access to only certain accounts, see Account Access.
To allow access to all accounts, follow these steps:
-
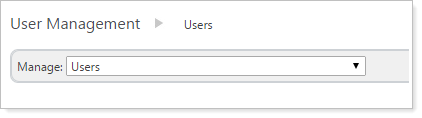
On the Setup menu, click User Management.
-
Choose Users in the Manage list.
-
Find the user to whom you want to grant access to all accounts and click Edit.
-
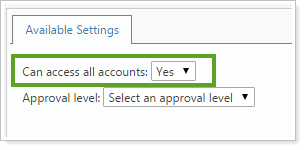
Select Yes in the Can access all accounts list. This is found under the Available Settings tab.
Note
This setting will be automatically set to Yes for enterprise administrators; this cannot be changed. To remove administrative privileges for a user, contact Tamarac support.
-
Click Save.
Note
This user may need to sign out and sign back in again for the changes to take effect.
Set a User's Trade Approval Level
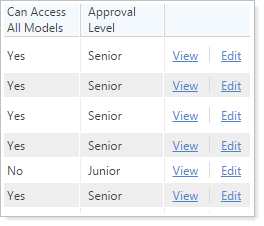
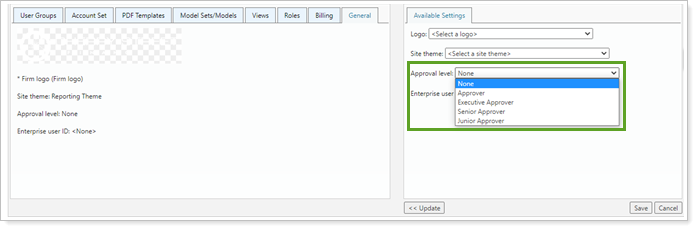
The Users section of the User Management page allows you to set the trade approval level for your individual users.
For more information on this process, see Assign Trade Approval Levels.
Grant Model Access to a User
The Users section of the User Management page allows you to grant individual users access to specific models or model sets in Advisor Rebalancing. While you can assign model access to users one-by-one, it's more efficient to create model sets. You can then assign model sets to individual users.
For more information on assigning access to models and creating model sets, see Models in User Management and Model Sets in User Management.
To grant a user access to models or model sets, follow these steps:
-
On the Setup menu, click User Management.
-
Choose Users in the Manage list.
-
Click Edit next to the user whose model access you want to change.
-
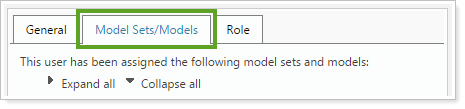
Click the Model Sets/Models tab.
-
Select a model or model set you want to grant the user access to. Models and model sets are available on the Available Model Sets, Available Security Level Models, and the Available Allocation Models tabs.
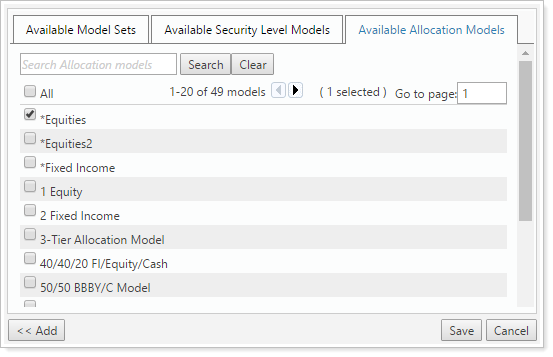
You can use the available search and page navigation to find specific models.
-
Click << Add.
-
Add any additional models and model sets using the same process by selecting them and clicking << Add.
-
Click Save.
Assign a Role to a User
A role is a set of pages and action that you define with a unique name. You can then assign that role, or set of permissions, to individual users. This allows you to limit access to various pages and tasks within Advisor Rebalancing to only those who need access, preventing accidental changes and protecting sensitive information.
For more information on creating and using roles, see Roles. For a full list of available permissions you can assign to roles in Advisor Rebalancing, see Available Role Permissions.
To assign a role to an individual user, follow these steps:
-
Create the appropriate role if you haven't already. For more information, see Roles.
-
On the Setup menu, click User Management.
-
Choose Users in the Manage list.
-
Click Edit next to the user you want to assign a role to.
-
Click the Role tab.

-
Select the appropriate role in the Role list.
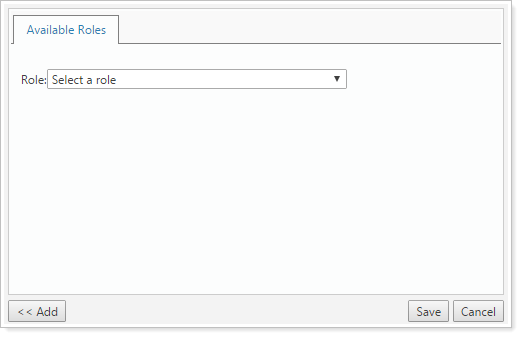
-
Click << Add.
-
Click Save.
Delete a User
At this time, users are not deleted directly in Advisor Rebalancing. To remove a user from Advisor Rebalancing, contact Tamarac service.