Contents

Introduction
You can make more informed decisions and streamline workflows by accessing data directly from Fidelity within Advisor View.
With this integration, you can:
-
See custodian account and cash balance values in Advisor View and Advisor Rebalancing. Make more informed portfolio rebalancing and trading decisions based on real-time custodial data without logging into multiple applications.
-
Start new account forms in Fidelity through Advisor View. Use Tamarac data to seed the digital account opening form at Fidelity.
-
See and Download Fidelity Statements, tax forms, and trade confirmations in the document vault. Use the Tamarac document vault to access Fidelity files. View or download the files for future use.
-
Set custodian as the source for specific reports. Use data from the custodian in the following reports:
-
Custodian Account Details report. Available through integration only. Allows you to see balance data, contacts, and holder information directly from the custodian.
-
-
Submit trades directly to the custodian. With this integration, there's no need to download and then manually upload your trade files – Advisor Rebalancing will automatically upload them to the custodian for you.
-
Single Sign-On. With this integration, you can log in to Advisor Rebalancing directly from Fidelity Wealthscape. You will remain authenticated so it won’t be necessary to reenter your user information each day.

Enrollment
To request the Fidelity Wealthscape Integration, initiate a Service Request through the Fidelity Service Center.
-
Service Menu > Service Center > Initiate Service Request (select master account) > User Access & Entitlements > Add or Modify Access
-
Inquiry Type: Third Party
-
Add Attachment: Fill out, sign, and attach the User Access Request Form for 3rd Party Services for Tamarac. This form is also available under the Service menu—click Forms, then Forms Library, and you can search for the document by name.
Once you've completed the request and the integration has been activated, Fidelity will reach out to Tamarac to enable the integration for all products.
Use Start New Forms for Digital Account Opening
Important
To start a new form for a client, they must be assigned to a Household with a valid address.
Filling out custodian forms is time-consuming, and it's easy to make mistakes that are difficult to fix. In order to improve accuracy of custodian form completion and streamline your processes, you can send client and Household information directly from Tamarac to Fidelity.
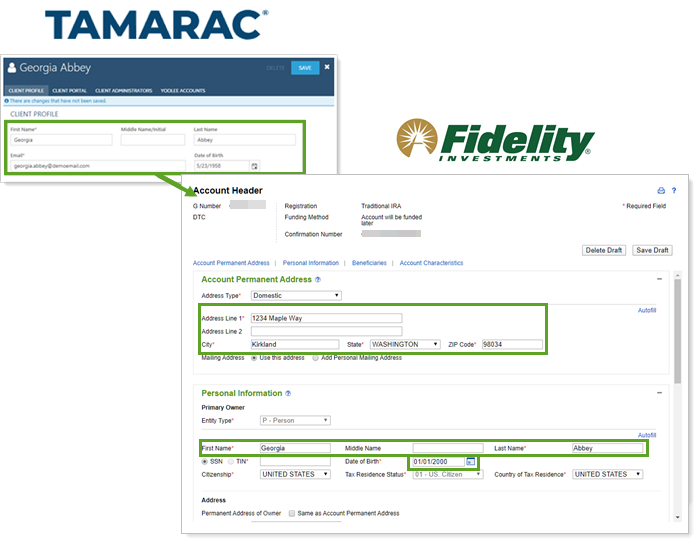
The following data are exported from Tamarac and imported into Fidelity forms:
| Data | Source | Is It Required? |
|---|---|---|
| First name | Client record | Required |
| Middle name/initial | Client record | Optional |
| Last name | Client record | Required |
| Date of birth | Client record | Required |
| Email address | Client record | Required |
|
Street address NoteForeign address, including Canadian address, are not supported. |
Household record |
Required |
Enable Digital Account Opening
To use this integration feature, the following must be enabled:
-
Start New Forms must be turned on at the firm level. Contact Tamarac Account Management at TamaracAM@envestnet.com to enable Allow Account Opening for your firm.
-
Your user must have the Start New Forms permission enabled under Accounts | Clients/Client Portals. Administrators automatically have access to Start New Forms.
Open Fidelity Account From Tamarac
To start a new account form from Tamarac:
-
On the Accounts menu, click Clients/Client Portals.
-
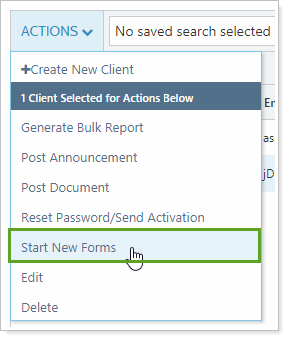
Select the client that you want to open a new account for at Fidelity. You can only send one client record at a time to Fidelity.
-
In the Actions list, click Start New Forms.
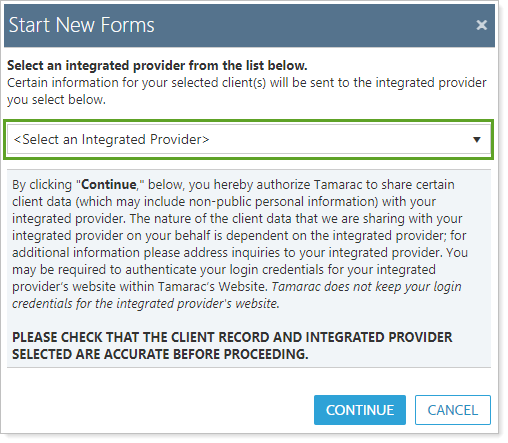
-
In the Start New Forms dialog, select Wealthscape from the provider list and click Continue.
-
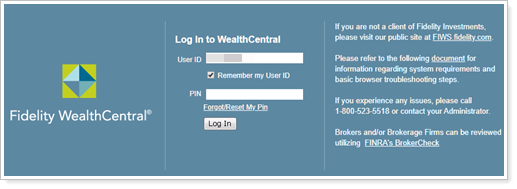
In the Authentication Required dialog, click Fidelity Wealthscape.

-
If required, enter your Fidelity credentials. How frequently you need to log in depends on your firm's settings with Fidelity.
-
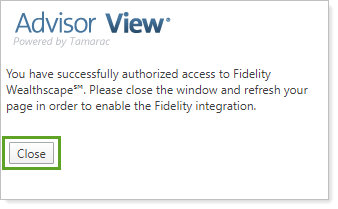
Authorize the connection.
-
Click Close.
-
In the Authentication Required dialog, click Refresh.

-
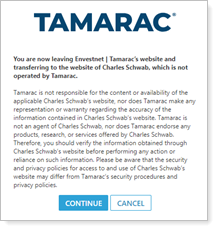
On the integrated partner redirect page, read the disclaimer and click Continue.
-
A new window will open the Fidelity Wealthscape account opening system. Complete the application from there.

Resolve Digital Account Opening Issues
If you aren't seeing the windows you expect, make sure your pop up blocker is turned off. The new account opening dialog will not open if your pop up blocker is turned on.
For help resolving common issues, see Start New Forms Troubleshooting.
See Custodian Values on the Accounts Page
If your firm is activated for Fidelity integration, you can see Fidelity data directly on the Accounts page in the Custodian... columns.
If you haven’t added the columns to the page, first add the columns:
-
Click Views and next to the desired view, click Edit.
-
In the list of available columns, click the Custodian Net Cash, Custodian Value, and Custodian Values Last Updated columns and click
 .
. 
TIP
You can press and hold CTRL to select multiple columns.
-
When you’re finished adding the columns, click Apply.
To see account and cash balance data directly from Fidelity on the Accounts page:
-
On the Accounts menu, click Accounts.
-
Select the accounts you want to see data shown for.
-
In the Actions list, click Retrieve Custodian Values.
The values will then appear in the Custodian Net Cash, Custodian Value, and Custodian Values Last Updated columns.

TIP
You may need to sort by custodian to see the specific custodian data if your firm is integrated with more than one custodian.
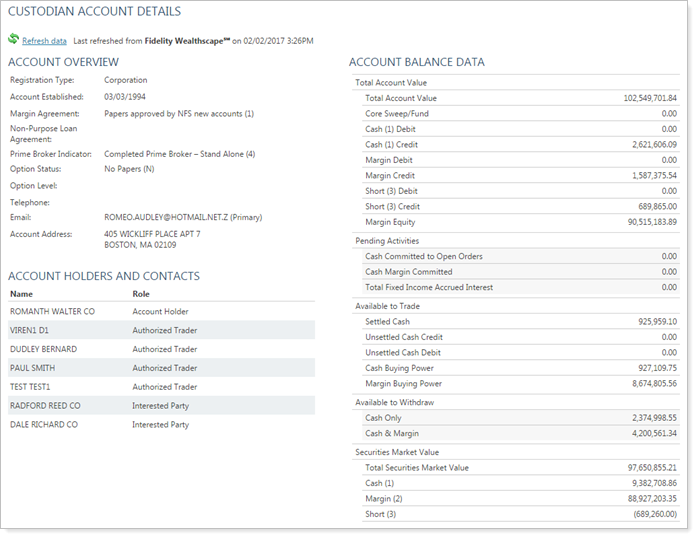
Run The Custodian Account Details Report
With the Custodian Account Details report, you gain instant access to Fidelity account information, including phone numbers, addresses, account overview information, email addresses, and more.
To open the Custodian Account Details report:
-
On the Reports menu, under Custodian Reports, click Custodian Account Details.
-
In the Find Data For list, click the desired account.
-
The report appears on your screen.
See Fidelity Files in the Document Vault
The Fidelity integration allows you to see statements, tax documents, and trade confirmations stored on the Fidelity servers in the Tamarac document vault.
Tamarac never stores the files displayed with this integration. Instead, Fidelity continues to store the files on their servers, and the Tamarac document vault provides a secure link to those files directly on the Fidelity servers.
The following are limits for the maximum age of files that you can see in this integration:
-
Tax Documents: 10 years
-
Trade Confirmations: 5 years
-
Account Statements: 10 years
Enable the Fidelity Document Vault for Firm Users
To see Fidelity folders and files in the document vault, Tamarac users must have both of the following enabled:
-
The Fidelity integration.
-
The Documents | Vault page permission for their role.
Enable the Fidelity Document Vault for Clients
The Fidelity document vault integration is not available for the client portal.
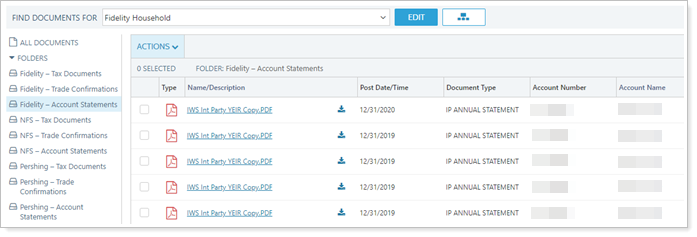
See Fidelity Documents in the Document Vault
To access the Fidelity folders in Tamarac:
-
On the Documents menu, click Vault.
-
In the Find Documents For list, select a client or Household that has Fidelity set as their custodian.
Note
Fidelity files are displayed for Households. If you search for a client in a Fidelity folder, you will see the files for the Household.
-
Click on the desired Fidelity folder.

If you aren't logged in to Fidelity already, enter your Fidelity credentials.
-
The applicable Fidelity files are displayed.

Filter Fidelity Folders
To find files more quickly, you can filter Fidelity files by date rage.
To filter by date, choose a date range from the date list or choose Custom Date Range to enter your own range and click Filter.

Download Fidelity Files
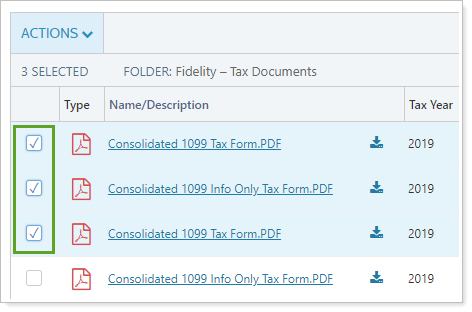
To easily obtain copies of multiple Fidelity documents, you can download up to 50 files at once.
To download multiple files from the document vault:
-
On the Documents menu, click Vault.
-
In the Find Documents For list, select the client or Household that you want to download files for. Remember, they must have Fidelity as their custodian.
Note
Fidelity files are displayed for Households. If you search for a client in a Fidelity folder, you will see the files for the Household.
-
Click on the desired Fidelity folder to view files. If you aren't logged in to Fidelity already, you will have to enter your Fidelity credentials to see the files.
-
Select the check box next to the files you want to download.
-
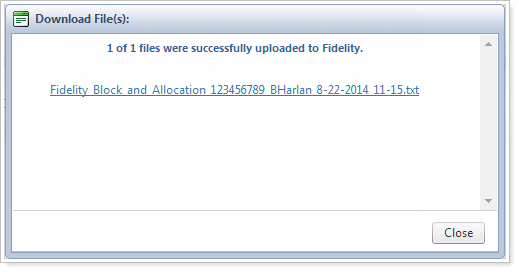
In the Actions list, click Download.

-
All the selected files are downloaded as a ZIP file for your use.
Manage Fidelity Document Vault Folders
Manage Fidelity files and folders with the following standard document vault folders actions. For more information about managing document vault folders, see Manage Folders.
Folder Actions
Actions available for Fidelity files and folders:
-
Rename and reorder the Fidelity folders.
-
View files within the document vault.
-
Download multiple files at once. When you download more than one file, all the files will be grouped into one PDF file for download.
-
Filter and sort Fidelity folders by column to more quickly find files.
Note
You cannot sort by the Name/Description or Account Name columns.
Folder Restrictions
The following restrictions apply when you manage Fidelity documents:
-
You cannot delete Fidelity integration folders.
-
You cannot delete or edit Fidelity files.
-
You cannot add labels to Fidelity files.
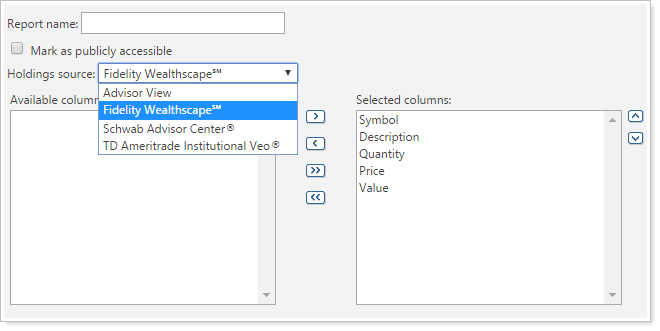
Set Fidelity as the Source for Advisor View Reports
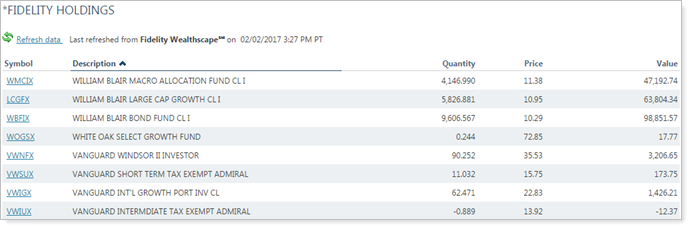
With this integration, you gain instant access to Fidelity holdings data that can be displayed in Advisor View reports.
To do this:
-
On the Reports menu, click the desired report.
A Holdings report is shown as a sample, but the procedure applies to all the above-listed reports.
-
Click Edit.
-
In the Report Type source options, change the source to Fidelity Wealthscape.
-
Select your columns and click Apply. The report will be loaded with Fidelity holdings data for the selected account.
Advisor Rebalancing Integration
In this section, you’ll find out how to access the various integration points between Fidelity and Advisor Rebalancing.
Single Sign-On From Wealthscape
Once activated for Fidelity integration, the new Tamarac option will appear under the Tools menu in Wealthscape. After authenticating for the first time, you will be able to sign in directly to Advisor Rebalancing by clicking on the Tamarac link.

See Account and Cash Balance Data
To see account and cash balance data directly from Fidelity, follow these steps:
-
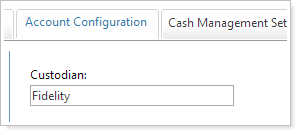
Update all of your Fidelity accounts to use the Fidelity custodian in the Account Configuration settings. Account and Cash Balance data will only be pulled for accounts where Fidelity is the assigned custodian.
-
On the Rebalance & Trade menu, click one of the following:
Rebalance
New Directed Trade
Rebalance Review
Trade List
-
In the More Actions list, click Retrieve Custodian Values. After you click Continue, the values will appear in the Custodian Cash Difference, Custodian Net Cash, Custodian Value, Custodian Value Difference and Custodian Values Last Updated columns.

-
If you haven’t added the columns to the page, click
 in the lower-right corner. In the list of available columns, click the Custodian Cash Difference, Custodian Net Cash, Custodian Value, Custodian Value Difference and Custodian Values Last Updated columns and then click
  . You can press and hold CTRL to select multiple columns. When you’re finished adding the columns, click Save.

Submit Trades Directly to Fidelity
With this integration, there's no need to download and then manually upload your trade files – Advisor Rebalancing will automatically upload them to Fidelity Wealthscape for you.
To submit trade files directly to Fidelity, follow these steps:
-
Create the trades as you do today.
-
Sign into Fidelity Wealthscape. You can click the Fidelity Wealthscape link at the top of the page to sign in. Your user will remain authenticated, so it’s not necessary to reenter your user information each day.

-
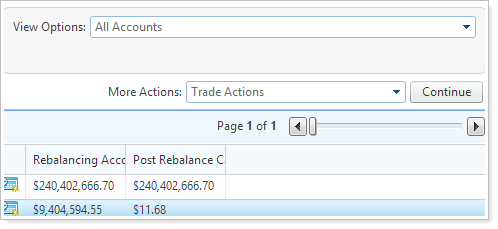
On the Trade List page, select the accounts where you want to submit trades.
-
In the More Actions list, click Trade Actions and then click Continue.
-
On the Trade Actions dialog, select the Send Fidelity trade files to Fidelity Wealthscape check box.
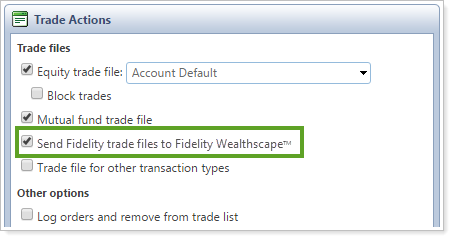
Advisor Rebalancing will submit the trades directly to Fidelity Wealthscape for all Fidelity trade files that are generated.