 Back
Back Home > Advisor View > Accounts, Groups & Households > Aggregated Accounts > Convert Balance-Only and Advisor Permissioned Data Accounts to Reconciled Accounts
|
Back |
Home > Advisor View > Accounts, Groups & Households > Aggregated Accounts > Convert Balance-Only and Advisor Permissioned Data Accounts to Reconciled Accounts
|
Convert Balance-Only and Advisor Permissioned Data Accounts to Reconciled Accounts
Some advisor permissioned data accounts (APD) and some client balance-only accounts are actually investment accounts and you might want to bring those accounts' full transaction, holdings, and performance data into Tamarac.
While you can see daily values or balance data for APD and balance-only accounts, you cannot see transactional data until you convert these accounts to be reconciled accounts. To be eligible for conversion, a balance-only or APD account must be:
An asset.
An investment account.
Below are steps to convert other linked account types to become reconciled accounts, allowing you to view the accounts on the Accounts page and use them in reports and client portals. For more information on account types and why you'd convert an account, see Understanding Linked Accounts.
When you do a conversion, the entire balance history is retained for the time the account was a balance-only account for historical reporting purposes. When you run a report for a date period while the account was a balance-only account, only the account value will be reported. When you run a report for a date period after the account was converted to a reconciled account, you'll see full transaction, holdings, and performance data.
Once converted, you will be able to add reconciled accounts to reporting groups and Households for full reporting capabilities.
For information on how the Net Worth report handles the change in account type, see View Assets and Liabilities on the Net Worth Report.
If you want to view transactions and holdings data for a linked advisor permissioned data (APD) account, that account must first be a converted into a reconciled account. To convert APD accounts, you will first use your login information with the associated custodian to initially bring multiple accounts with that custodian into Tamarac. For more information on this process, see Link, Edit, or Unlink Accounts on the Aggregated Accounts Page.
Once linked, you can individually convert each of these accounts to be a reconciled account. This final conversion step, detailed below, will allow you to see transactional data for these accounts.
To convert an account, follow these steps:
Under Accounts, click Aggregated Accounts.
Find the balance-only or advisor permissioned data account you want to upgrade.
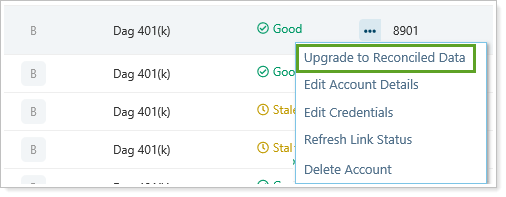
Click Edit Options ( ).
).
Click Upgrade to Reconciled Data.
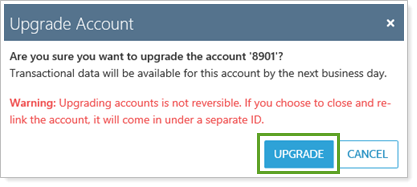
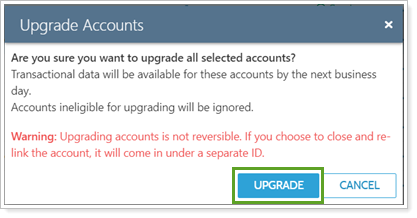
In the Upgrade Account dialog, click Upgrade.
On the Aggregated Accounts page, the account's Data Level changes to ![]() and Link Status changes to
and Link Status changes to  . After the nightly sync, the account will be fully converted.
Accounts are converted during your nightly sync. It can take up to 24 hours for balance-only accounts to convert to reconciled accounts.
To convert more than one account at a time, follow these steps:
Under Accounts, click Aggregated Accounts.
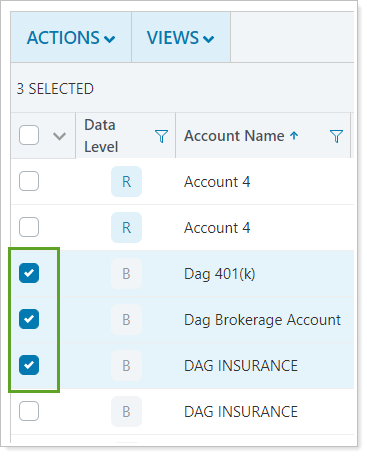
Select the balance-only or advisor permissioned data accounts you want to upgrade. Remember that all the selected accounts must be financial accounts eligible for converting. Any accounts not eligible for conversion will be ignored.
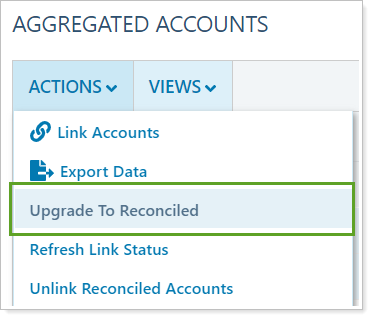
Click Actions.
Click Upgrade to Reconciled.
In the Upgrade Account dialog, click Upgrade.
On the Aggregated Accounts page, the account's Data Level changes to ![]() and Link Status changes to . After the nightly sync, the account will be fully converted.
and Link Status changes to . After the nightly sync, the account will be fully converted.
Accounts are converted during your nightly sync. It can take up to 24 hours for balance-only accounts to convert to reconciled accounts.
When you convert a linked account to be a reconciled account, it is automatically removed from all Households the balance-only account belonged to.
To see the account in the Net Worth report, you'll need to add it to the Household. To see the account in other reporting, add it to the client's reporting group(s).
To add the reconciled to a Household or group, follow these steps:
Under Accounts, click Accounts.
Find the reconciled account you want to add to a Household.
Click the account name to open the account edit panel.
Under Membership, click Households/Groups.
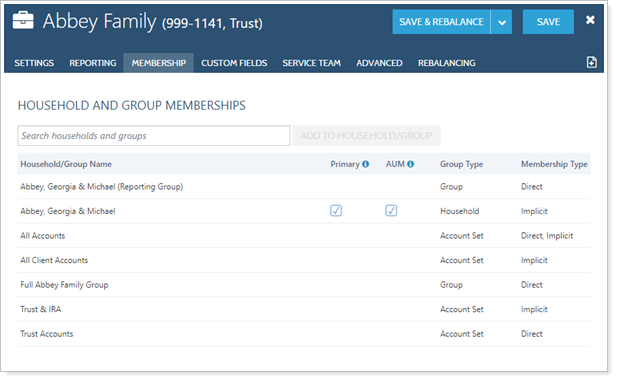
In Search households and groups, search for the Household or group you want to add the account to.
Click Add to Household/Group.
Set the Household as primary, if applicable. For more information, see Set a Primary Household.
On the Aggregated Accounts page, the Data Level column identifies the linked account types:

Balance-only accounts 
Advisor permissioned data (APD) accounts 
Reconciled accounts
If there are data issues with reconciled accounts, you can tell Tamarac to remove the matching it has automatically done to connect the reconciled account coming in from Yodlee with a Tamarac account. You can also set specific accounts as not eligible for matching with a Yodlee reconciled account.
To adjust account matching:
Create an Account Information bulk report.
Under Available columns, in the Account General section, add Yodlee ID and Yodlee matching status to the Selected columns list.
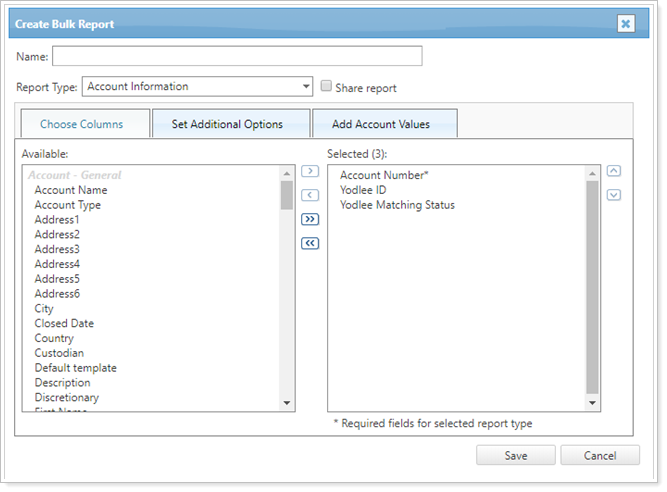
Run the bulk report. For more information, see Bulk Reports.
When you run the bulk report, each account will display one of following results in the Yodlee Matching Status column:
Yes: The Accounts page account is matched with a reconciled account. The Accounts page account will also have an ID in the Yodlee ID column that matches the reconciled account's Yodlee ID.
No: This account has been set to never be matched with a reconciled account. The Yodlee ID column is blank.
Blank: This account is available to be matched with a reconciled account. The Yodlee ID column is blank.
In the CSV, change the Yodlee matching status column to Yes or No.
From No to Yes: The account is eligible for automatic matching with reconciled accounts that come through Yodlee during the next sync.
From Yes to No: The account is currently matched. You want to clear that matching but leave the account available to be matched in the future.
From Blank to No: Never match this account with any reconciled accounts.
Tamarac automatically populates the Yodlee ID column when a reconciled account is created and matched with an account on the Accounts page. You cannot manually match or use a bulk report to match accounts.
Upload the CSV file. For more information, see Bulk Data Uploading.

