Contents
|
|
Introduction
Security mapping allows you to configure unknown securities in Advisor Rebalancing so that they correspond with the correct securities in your Portfolio Accounting System (PAS). Also, you can map securities so that they appear in Advisor Rebalancing as something else, such as mapping liquid investments funds to sweep cash, or $$$. When securities are correctly mapped, their values will reflect accurately in clients' accounts.
Occasionally, you may need to perform security mapping when you encounter security errors. While Tamarac recognizes a wide array of securities, you may encounter a security that is not recognized. When this happens, you'll receive an error message alerting you of the unrecognized security and you can use security mapping to resolve this error.
The follow holdings are reasons you may need to use the Security Mapping page:
-
Symbols for ETFs or funds you want to appear as cash ($$$)
-
Different individual bonds you want to appear as one symbol
-
Limited partnerships and other alternative assets
-
Preferred stock
important
Do not map securities to tradable tickers.
Best Practice
Review your error and warnings daily to identify possible security errors and resolve them so that your clients' account values are represented accurately. You can check errors on the Status page. For more information, see Upload Status and Troubleshooting.
Map Securities
Using security mapping, there are several ways you can update your securities. You can update security mapping in the various ways below.
Map a Security to Cash
In some cases, you may need to map a security to cash, also called sweep cash and represented as $$$. This applies to liquid investments or sweep cash that are represented in your portfolio accounting system (PAS) with symbols like TEF, TEFX, GSP, CASH, MMG, and CAF. After mapping these securities, these liquid investments will be treated like cash and will appear in Advisor Rebalancing as cash, $$$.
Example
An advisor fails to map symbol TEF to $$$ in Advisor Rebalancing, then exports holdings out of the firm's PAS to upload those holdings into Advisor Rebalancing.
Part of the exported holdings is a client with a 10,000 share position in TEF. While the advisor's PAS recognizes TEF as sweep cash priced at $1, Advisor Rebalancing recognizes TEF as the symbol for Telefónica, S.A., a stock trading at $9.75.
Upon uploading the holdings, Advisor Rebalancing shows that client's holdings in TEF to be valued at $97,500 (10,000 shares of TEF × $9.75). If the advisor had rebalanced this account, the client's account value would be grossly overvalued.
Note
For position traded securities that aren't liquid and will require trading, create cash substitutes. When you create a cash substitute, the value of these securities will be counted like cash, but they will generate a trade when being bought or sold.
See Cash Substitutes for more information.
To map a security to cash, follow these steps:
-
Click Security Mapping on the Upload menu.
-
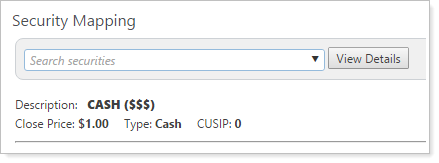
Enter $$$ in the Search securities box and then click View Details.
-
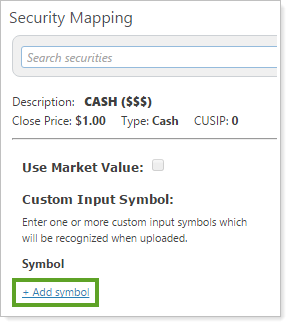
Click the + Add symbol link in the Custom Input Symbol section.
-
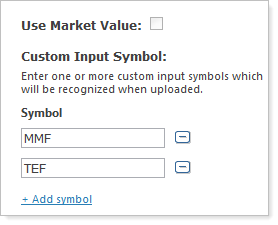
Enter the applicable symbol in the box that appears. Click the + Add symbol link to add additional symbols, if necessary.
-
Click Save. These changes will take effect the next time you upload data.
Map a Security Based on Security Type
You can map securities to a dummy ticker using security type mapping. When you map several securities to a security type, Advisor Rebalancing uses the security type you enter during trading rather than the individual securities you enter. This method is often used with fixed income securities to combine a large number of fixed income securities into one ticker, FIXEDINCOME, that can be added to models rather than adding each of the fixed income securities individually.
To map a security to a security type, follow these steps:
-
Click Security Mapping on the Upload menu.
-
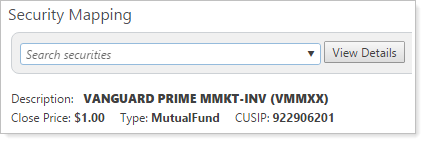
Type the ticker of the security you want to map to your target symbol or dummy ticker in the Search securities box and then click View Details.
-
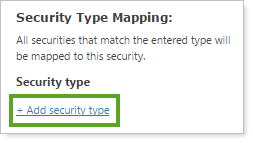
Click the + Add security type link in the Security Type Mapping section.
-
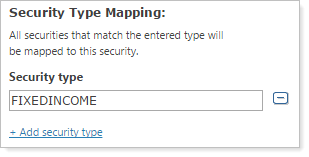
Enter the applicable target symbol in the box that appears. Click the + Add security type link to add additional symbols, if necessary.
-
If mapping to a dummy ticker, select the Use Market Value check box to ensure that Advisor Rebalancing uses the market value from the upload.
-
If mapping to a security type that is a tradable security that Advisor Rebalancing recognizes, do not select the Use Market Value check box.
-
-
Click Save. The changes will take effect the next time you upload data.
Map a Traded Security
You can map securities to a custom symbol. This allows you to take an unrecognized symbol that exists in your portfolio accounting system (PAS) and map that symbol to an alternate symbol in Advisor Rebalancing. The most common use for this feature is mapping securities with special symbols to use symbols recognized in Advisor Rebalancing.
Note
To map into Advisor Rebalancing, use the custom input feature mentioned below. This takes symbols from your PAS and tells Advisor Rebalancing which symbols to use instead, use the custom input symbol feature.
To map out of Advisor Rebalancing, use the Custom output symbol feature under Trade File Group settings. This takes symbols from Advisor Rebalancing and uses the alternate symbols that you specify on trade files.
For more information, see Trade File Group Settings.
To set a custom input symbol, follow these steps:
-
Click Security Mapping on the Upload menu.
-
Type the target symbol in the Search securities box and then click View Details.
-
This will be the recognized symbol you are going to map your unrecognized symbol into.
-
If you enter a dummy ticker, verify that it is valid in Advisor Rebalancing. If the security you enter appears in the list, it is valid. If it doesn't appear in the list, it's not valid.
-
-
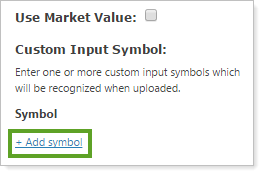
Click the + Add symbol link in the Custom Input Symbol section.
-
Enter the applicable symbol in the box that appears. Click the + Add symbol link to add additional symbols, if necessary.
-
This symbol will be the one you want to appear on trade files.
-
Do not check Use Market Value.
-
-
Click Save. The changes will take effect the next time you upload data.
Set Default Original Cost Per Share
If an original cost per share wasn't provided for a security, you can apply a default original cost per share. This is not needed for traded securities, but may be necessary for non-traded securities in your clients' accounts.
Note
This is a global setting and, if set, will apply to every account holding that security.
When you set this original cost per share, you can also choose to use the current system price or a custom price. Once you set the default original cost per share, this can affect reporting on that security, so choose the appropriate option for your firm.
To set default original cost per share, follow these steps:
-
Click Security Mapping on the Upload menu.
-
Type the security symbol in the Search securities box and then click View Details.

-
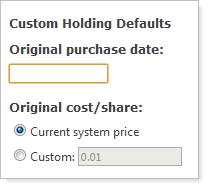
Under Original cost/share, choose one of the following:
-
Current system price: Advisor Rebalancing will consider the original cost per share to be the current price of the security on the system.
-
Custom: Advisor Rebalancing will consider the original cost per share to be the custom price you enter in this box.
-
-
Click Save. The changes will take effect the next time you upload data.
Note
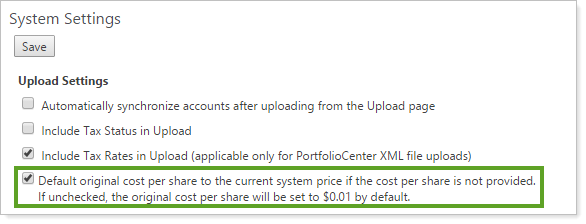
The Default original cost per share to the current system price if the cost per share is not provided option is a system setting that affects the way Advisor Rebalancing views original cost per share when it's not specified.
-
When selected, the default original cost per share on a security will be the current system price if you've not provided an original cost per share. If you choose this option, you won't see a gain/loss for the security because the cost basis will be set to the current system price.
-
When cleared, the original cost per share on a security will be $0.01 if you've not provided an original cost per share. If you choose this option, you will see a dramatic change in gains as the cost basis is set to a penny.
Set Original Purchase Date
If an original purchase date wasn't provided for a security, you can apply a default original purchase date.
To set a default original purchase date, follow these steps:
-
Click Security Mapping on the Upload menu.
-
Type the applicable symbol in the Search securities box and then click View Details.
-
In the Original purchase date box, type the default original purchase date.

-
This date must be greater than or equal to 1/1/1900.
-
This date must be less than or equal to the current trade date.
-
-
Click Save. The changes will take effect the next time you upload data.


