 Back
Back|
Back |
|
Benchmarks
|
|
When evaluating the performance of any investment, it's likely that you'll want to compare it against an appropriate benchmark. Advisor View includes hundreds of indexes that you can use to gauge the performance of an account or reporting group, including the S&P 500, the Dow Jones Industrial Average, the Russell 2000 Index, etc. Advisor View features over 370 indexes that you can assign to accounts and groups. For a complete list of the indexes available in Advisor View, visit List of Available Indexes.
You can include up to 10 benchmarks for any account or group. You can configure the number of benchmarks you want to use and determine the name that appears for each. For details, visit Configuring the Number of Benchmarks to Enable.

In some cases, you may want access to a benchmark that's not available in our standard set of benchmarks. If you're interested in adding a specific benchmark to Advisor View, please contact your dedicated service team. Please be aware that there is generally a one-time fee to add a benchmark.
In addition to adding an index to Advisor View, you can also add your own or create a blended index that's a combination of two or more standard indexes. For more information on those options, visit Blended Indexes and Custom Indexes.
To configure the number of benchmarks you want:
On the Setup menu, click System Settings.
Under Account Benchmark Display, select the check box in the Enabled column for each benchmark you want to enable.

In the text box next to each benchmark, type a display name for the benchmark. This name will appear next to the benchmark name on your reports. For more information about benchmark names, see Customize Account Benchmark Displays in System Settings.

Click Save.
To assign a benchmark to an account or group:
On the Accounts menu, click Accounts.
Click the name of the account or reporting group where you want to assign a benchmark.

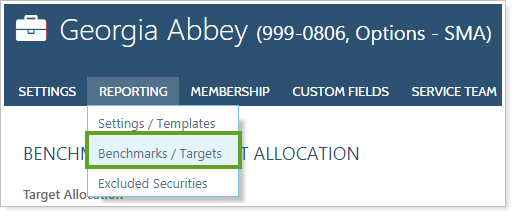
On the Reporting menu, click Benchmarks / Targets.
Click Edit next to the benchmark you want to set. You can control the number of benchmarks by following the steps in Configuring the Number of Benchmarks to Enable.
In the Benchmark list, choose the benchmark you want to assign to the account or reporting group. You'll have the option to use our available indexes, custom indexes or any blended indexes you've created.

In the Start date box, click the ![]() to choose a start date for the benchmark. If you want to set the start date as the inception date for the account or reporting group, select the Use inception date check box.
to choose a start date for the benchmark. If you want to set the start date as the inception date for the account or reporting group, select the Use inception date check box.

Choose one of the following:
INSERT INTO EXISTING BENCHMARK HISTORY BASED ON THE START DATE. Selecting this option will insert the selected benchmark into the account’s comparison history based on the start date. In the example below, the benchmark added on 12/31/13 did not replace the later benchmark for Barclays US Agency.

REPLACE BENCHMARK HISTORY BASED ON THE START DATE. Selecting this option will replace all benchmarks associated with the selected account from the start date. In the example below two benchmarks start after 12/1/2013, so after the new benchmark is added those benchmarks will no longer display.

Click Add Benchmark. You may need to click out of the Start date box to activate the Add Benchmark button.
If you don't add the benchmark, it will be lost and will not display on your reports.
Benchmarks added are listed alphabetically, with numbers following the letter Z.
Click Save.
To update a benchmark for an account or group:
On the Accounts menu, click Accounts.
Click the name of the account or group where you want to delete a benchmark.

On the Reporting menu, click Benchmarks / Targets.
Click Edit next to the benchmark you want to delete.
Click Delete next to the benchmark you want to delete.


