Contents
|
|
Introduction
This Help topic describes how to complete the quarter-end billing process in Advisor View. This process consists of the following steps:
-
Building Saved Searches to find accounts that are not part of a billing group or are in more than one group.
-
Generating the fees you want to bill for.
-
Verifying your clients have enough available cash to pay the invoice.
-
Submitting the fees to the custodian.
-
Manually reconciling fees for clients paying by check.
Saved Searches
The first step in the process is to identify and correct any accounts that are not in a billing group or that are in more than one billing group. To identify these accounts, you can build saved searches.
Accounts Not in a Billing Group
To build this saved search:
-
On the Reports menu, click Saved Searches.
-
In the Search Name box, type Accounts Not in a Billing Group.

-
Click Add Filter.
-
In the list of Saved Search filters, click Billing Group, and set the value to Is None, as shown in the picture below.

-
Click Save.
After you’ve built this saved search, you can run it on the Accounts page to identify any accounts that are not in a billing group. After you’ve identified those accounts, be sure you’ve added them to a billing group, if applicable.
Accounts In More Than One Billing Group
To build this saved search:
-
On the Reports menu, click Saved Searches.
-
In the Search Name box, type Accounts In More Than One Billing Group.

-
Click Add Filter.
-
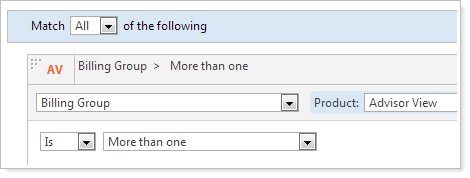
In the list of Saved Search filters, click Billing Group, and set the value to Is More than one, as shown in the picture below.
-
Click Save.
After you’ve built this saved search, you can run it on the Accounts page to identify any accounts that are in more than one billing group. After you’ve identified those accounts, be sure you’ve removed them from the incorrect billing group.
Generating the Fees
After you’ve verified that all of your accounts are assigned to a billing group, you will first generate the billing history for your client, and then generate a PDF report.
NOte
If the month/quarter ends on a weekend, you will need to wait one business day after the weekend to generate the billing statement. Advisor View will only have closing prices as of the Friday before the weekend.
Generate Billing History
To generate billing history:
-
On the Billing menu, click Billing Groups.
-
Select the billing group(s) you want to generate fees for.
-
In the More Actions list, click Generate Billing History.
-
In the Billing date box, add the date you want to generate the billing history for.
-
Click Generate Billing History.
-
If the group's billing history has not previously been generated for the selected date, the billing history will be generated, and you can view it on the Billing History page.
-
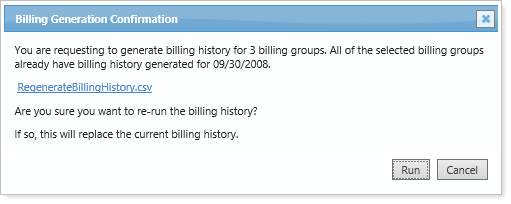
If this group's billing history has already been generated for the selected date, you will see an alert asking you to verify whether you want to overwrite the existing billing history.
-
Generate the Billing Statement
To generate a PDF report:
-
On the Accounts menu, click Accounts.
-
In the list, click Accounts, click All Accounts in the next list, as shown in the picture below, and then click Filter.

-
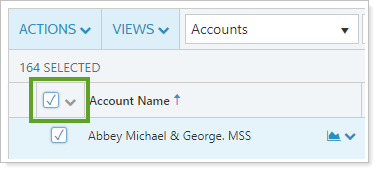
Select the check box next to the Account Name column heading. Selecting this check box will select all accounts on the page.
-
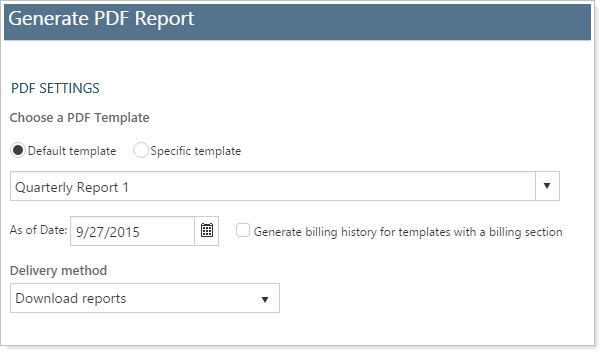
In the Actions list, click Generate PDF Report and then complete the following:
SELECT TEMPLATE. Click the template that you use for billing statements.
AS OF DATE. Specify the date of your quarter end.
DELIVERY METHOD. Click Download reports.
Note
If you know billing history has not been generated for the account/group, the recommended workflow is to generate it from the More Actions list on the Billing Groups page, accessed from the Billing menu.
However, you can also click the Generate billing history for templates with a billing section check box (visible if you have the Generate billing history permission set on the User Management page). If you generate it here, there's a chance you could accidentally overwrite existing billing history. We have included alerts to help reduce this possibility.
-
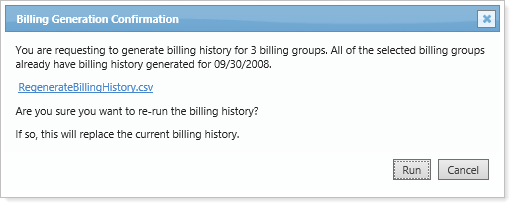
For groups,the alert includes a link to a CSV file that contains a list of the groups that don't have billing history for the date you selected.
-
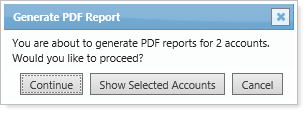
For accounts, the alert allows you to see which accounts will be affected.
-
Click Generate Report. Advisor View will take you to the PDF Report Status page. When the status of the report changes to Completed, you’re finished with this step. You do not need to open the reports at this stage in the process.
Running the Billing History Report
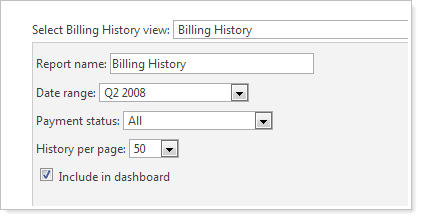
The Billing History report shows the time periods, adjustments, paid amounts, and billing amounts for each portfolio. On this page, you can start an auto-reconciliation, export your management fees, and perform a custodian export of your billing information.
To run the Billing History report:
-
On the Billing menu, click Billing History.
-
In the Find data for list, click All Accounts.
-
Click Edit. In the Date Range list, click the date period for the quarter that you are billing for. When finished, click Apply.
Verify Available Cash
After you’ve generated the Billing History report, follow these steps to verify that your fees are correct, that each client has enough available cash to pay the invoice, and submit the fees to your custodian:
-
On the Billing History report, click Export Data. Advisor View will download a CSV file. Open the file in Microsoft Excel. For the remaining steps, you’ll remove the columns that are not necessary.
-
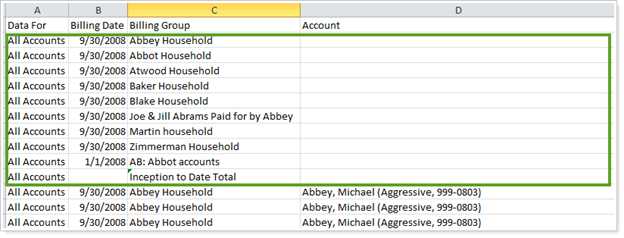
In Microsoft Excel, sort the spreadsheet by Column E (Account Name). After you sort by this column, a few blank rows should appear. Delete these rows from the spreadsheet.
-
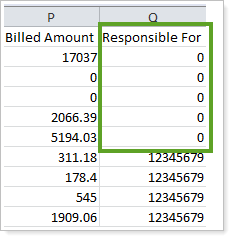
Sort by Column Q (Responsible For) and remove any accounts that are blank or are responsible for paying $0. If you identify any of these rows, you should remove them from the spreadsheet.
- Delete columns T (Payment Status), U (In Reporting Group), and V (Billing Group Total) from the spreadsheet.

-
In column T, add the following formula for each row:

This formula takes the Responsible For amount and compares it against the amount of available cash. If this amount is a negative number, you’ll need to generate cash for the client.
Submit Fees to the Custodian
Once you’ve verified that all clients have enough available cash to pay the invoice, follow these steps to submit the fees to the custodian:
-
On the Billing menu, click Billing History.
-
In the Find data for list, click All Accounts.
-
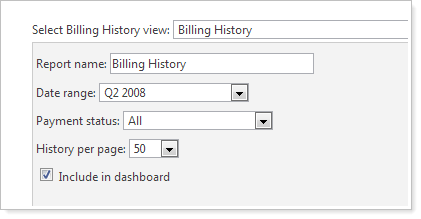
Click Edit. In the Date Range list, click the date period for the quarter that you are billing for. When finished, click Apply.
-
Click Custodian Export. Advisor View will prompt you to save a file. Save this file to your desktop and then submit it to your custodian, as you typically do.
Reconciling Fees
Once the fees have been debited from the accounts, follow these steps to reconcile your accounts:
-
On the Billing menu, click Billing History.
-
In the Find data for list, click All Accounts.
-
Click Edit. In the Date Range list, click the date period for the quarter that you billed for. When finished, click Apply.
-
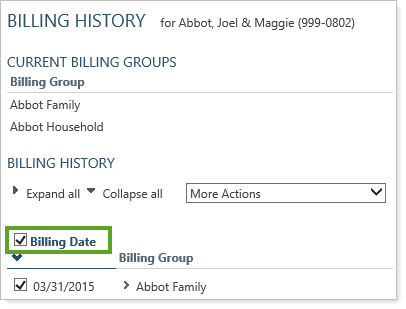
Select the check box next to the Billing Date column to select all billing groups.
-
In the More Actions list, click Auto-Reconcile, then click Start Auto-Reconcile. This will look in the accounts for management fee transactions that match each account and will automatically update the payment status to Paid.
If you need to manually reconcile for accounts paying by check, follow these steps instead:
-
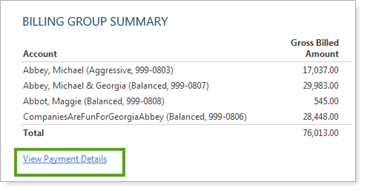
On the Billing History page, click the > next to the account that’s paying by check.
-
At the bottom of the expanded area, click View Payment Details.
-
Click Edit next to the account that’s paying by check.
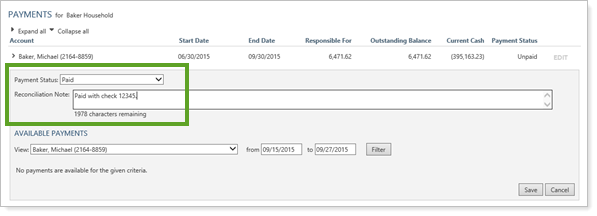
In the Payment Status list, click Paid. In the Reconciliation Note box, type a description of the payment – for example, Paid with check 12345. When finished, click Save.
