
Contents

Introduction
Have you ever wanted to include your own financial tracking metrics on the client portal? Have you ever wanted to see meeting-related details on the Households page? Custom fields allow you to do all this and more.
On the Custom Fields page, you can configure the custom fields for the Household.
Example 1: Display Financial Goal Progress on Client Portal
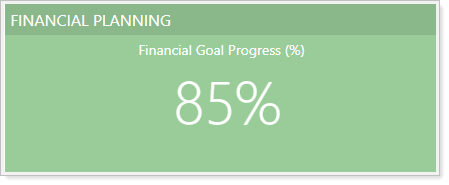
Cherry Street Financial has its own in-house financial planning offering. This service gives clients a percentage that indicates the likelihood of meeting their financial goals based on their current financial choices.
Cherry Street adds a custom field called Financial Goal Progress (%) and they use a bulk upload to populate all the Households with this metric. They then create a client dashboard tile that displays this percentage on the client portal, allowing each client to see their Household's financial planning status.
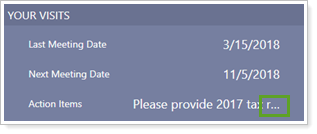
Example 2: Use Dashboard Tiles for Meeting Reminders
Cherry Street Financial wants to help clients remember the last time they met with their financial advisors and provide a gentle reminder of any outstanding action items each time clients log in to their portals. To do this, they create Household custom fields for display on the client portal dashboard. They complete the following steps.
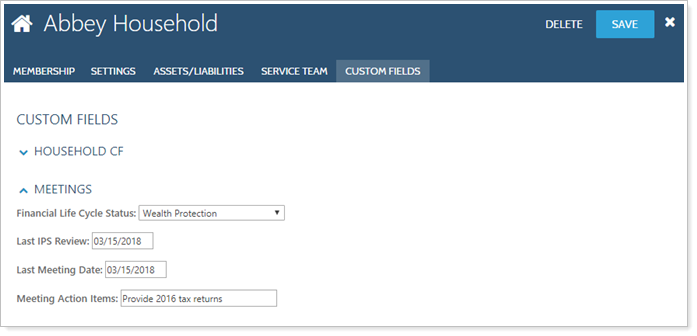
First, under Custom Fields, they set up meeting-related custom fields and add them to a Client Meetings custom field section. To learn more about creating custom fields, see Custom Fields for Accounts, Reporting Groups, Households, and Securities.
Once created, Cherry Street users can see the Client Meetings section and custom fields on each Household's Custom Fields tab.
Next, they create a client portal dashboard tile featuring those custom fields and add it to their existing client portal dashboard. To learn more about creating dashboard tiles, see Client Views - Dashboard Tiles and Client Views - Dashboard Page.
Finally, they use a Household Information upload data set to populate the custom fields for all Households at once. For more information about uploads, see Bulk Data Uploading.
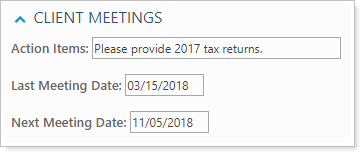
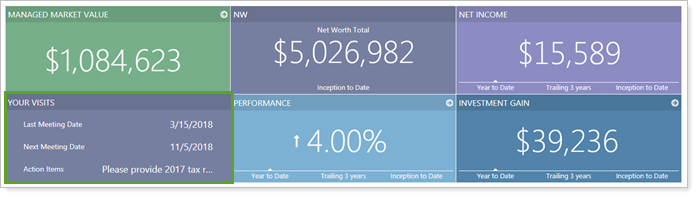
Now when clients log in to their portals, they see a tile reminding them of the last time they met with their Cherry Street advisor and any outstanding action items.
This Help topic discusses only the fields on the Custom Fields page, available when you edit a Household. For more information on editing Households, including how to navigate to this panel, visit Create a Household or Edit a Household.
For more information on creating and managing custom fields, see Custom Fields for Accounts, Reporting Groups, Households, and Securities.

Assigning Custom Fields to Households
Once you've created a global custom field, you can assign it to a Household:
-
On the Accounts menu, click Households.
-
Click the Household where you want to assign the custom field.

-
Click Custom Fields and choose the values for the custom fields. If the custom field you want does not appear, visit Create Custom Fields.
Note
When displaying Household custom fields as dashboard tiles, the field name or the field content may exceed the amount of space available for display. When this happens, the item is truncated with ellipses (…).
If you have a longer field you want to display, consider creating a dashboard tile with just that single data point. This ensures that the full text is displayed.
Tip
Keep custom field names clear and precise if your clients are likely to see it on their dashboards.
- When finished making the changes, click Save.