Contents
Retain comparison history when changing benchmarks
When you change a benchmark for an account, Advisor View now gives you the option of retaining the history of all benchmarks that have been assigned to the account by appending the new benchmark history to the previous benchmark history.
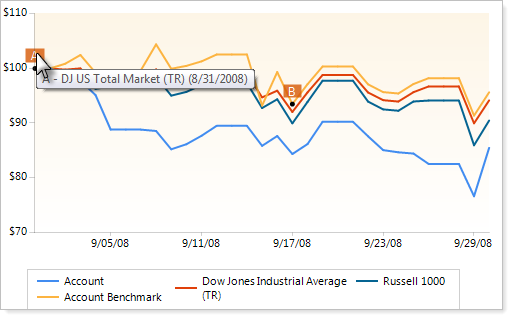
Change an account benchmark
To change an account benchmark, follow these steps:
-
Click the Accounts menu.
-
Select one or more accounts where you want to change the comparison benchmark, and then, in the More Actions list, click Assign Benchmark.
-
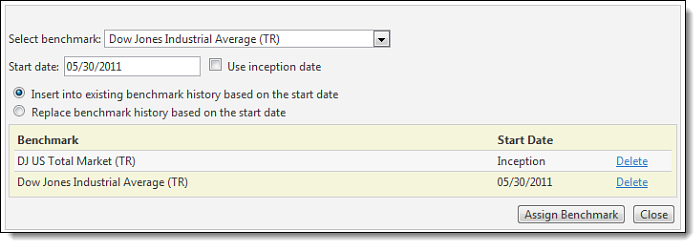
In the Select benchmark list, choose a new benchmark for the accounts.
-
Click the Start date box, and then click the start date for the benchmark on the calendar. If you'd prefer to use the inception date as the start date for the benchmark, select the Use inception date check box.

-
Choose one of the following:
Insert into existing benchmark history based on the start date. Selecting this option will insert the selected benchmark into the account’s comparison history based on the start date.
Replace benchmark history based on the start date. Selecting this option will replace all benchmarks associated with the selected account from the start date.
- Click Assign Benchmark.
View benchmark history on the Account Performance report
You can view benchmark history on the dynamic Account Performance report or the PDF version of the Account Performance report.
Add benchmark history to the dynamic Account Performance report
To view benchmark history on the dynamic Account Performance report, follow these steps:
-
On Reports menu, click Account Performance.
-
In the Search accounts box, start typing the name of the account where you want to view benchmark history on the report. When you see it in the Find data for list, click Change.
-
Click Edit.
-
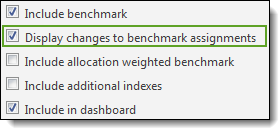
Select the Include benchmark and the Display changes to benchmark assignments check boxes.
-
Click Apply. The benchmark history will now appear on the report.
Add benchmark history to the Account Performance section of a PDF template
To add benchmark history to the Account Performance section of a PDF template, follow these steps:
-
On the PDF Templates menu, click Templates.
-
In the Select a template list, choose the PDF template you want to modify. If you haven’t created a PDF template, choose Create new template.
-
In the Add a section list, click Account Performance and then click Add.
-
Under Line Chart, select the Include benchmark and the Display changes to benchmark assignment check boxes.

-
Click Save. The benchmark history will now appear on the report.
Change the rebalance frequency for blended indexes
Many of you asked for control of how often blended indexes are rebalanced so you can more efficiently calculate returns. With this release, you can specify the interval at which Advisor View should rebalance your blended indexes. This feature allows you to rebalance blended indexes at the same interval you rebalance your accounts.
The following frequencies are available:
-
Daily
-
Monthly
-
Quarterly
-
Semi-Annually
-
Annually
-
None
To change the rebalance frequency for blended indexes, follow these steps:
-
On the Setup menu, click Blended Indexes.
-
In the Select blended index list, choose the blended index where you want to change the rebalance frequency. If you haven't created a blended index, click Create new blended index.
-
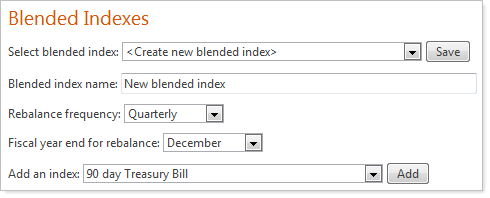
In the Rebalance frequency list, choose the rebalance frequency for the blended index.
-
In the Fiscal year end for rebalance list, choose the last month of the fiscal year.
-
Click Save.
Allocation-weighted benchmarks
We received several user requests for a blended benchmark that adjusts its blend each day based on the value of account holdings in each category, such as asset class, security type, and sector. With this release, you can add allocation-weighted benchmarks to the dynamic Account Performance report and your PDF templates.
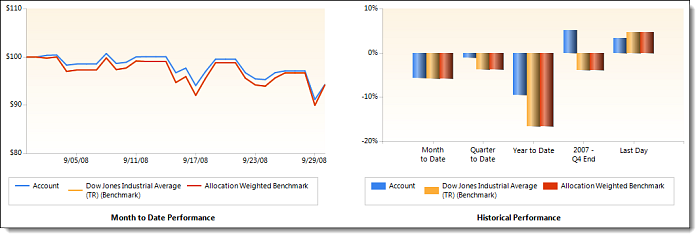
Add an allocation-weighted benchmark to the dynamic Account Performance Report
To view the allocation-weighted benchmark on the dynamic Account Performance report, follow these steps:
-
On Reports menu, click Account Performance.
-
In the Search accounts box, start typing the name of the account where you want to see the allocation-weighted benchmark. When you see it in the Find data for list, click Change.
-
Click Edit.
-
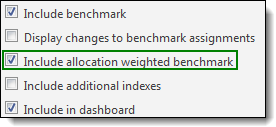
Select the Include allocation weighted benchmark check box.
-
Click Apply.
Add an allocation-weighted benchmark to a PDF template
To add an allocation-weighted benchmark to a PDF template, follow these steps:
-
On the PDF Templates menu, click Templates.
-
In the Select a template list, choose the PDF template you want to modify. If you haven’t created a PDF template, choose Create new template.
-
In the Add a section list, choose one of the following:
Account Performance
Summary
- Select the Include allocation weighted benchmark by check box, and in the list, choose the category that you want to use for the benchmark.

-
Click Save. The allocation-weighted benchmark will appear on the report.

Use reporting groups to create portal accounts
With this release, you can add reporting groups imported from Schwab Performance Technologies® PortfolioCenter® to a portal account. With this feature, accounts are automatically updated in Advisor View as they are added or closed to groups in PortfolioCenter. In addition, you can now add more than one reporting group to a portal account.
To check out this feature, follow these steps:
-
On the Setup menu, click Portal Account Setup.
-
Click the
 next to Drop accounts here to start a new group or add accounts.

-
Select the Groups only check box to view your reporting groups.
-
In the Add Account list, choose the reporting group to use to create your portal accounts.
-
Click Add.
-
Click Save All.
Quickly assign user groups, accounts sets, and roles to a user
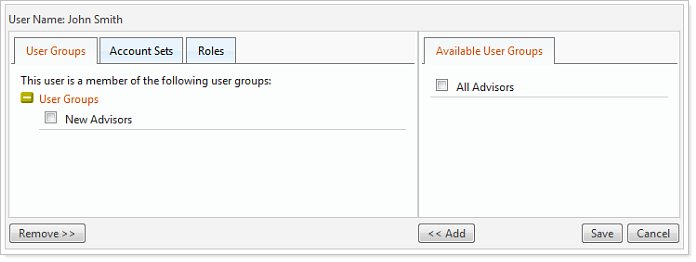
In our previous release, we delivered a powerful feature that lets you control user access to specific program areas and accounts in Advisor View. With this release, we've made it easier to determine the account sets, user groups, and roles assigned to a particular user.
To check out this new feature, follow these steps:
-
On the Setup menu, click Permissions.
-
Under Maintenance, click Manage Users.
-
Click Edit next to the user you want to view.
-
Choose the user groups, account sets, and roles for the user.
To add a user group, account set, or role, in the available list, select the associated check box and then click Add.
To remove a user group, account set, or role, in the selected list, select the associated check box and then click Remove.
Use the User Groups, Account Set, and Roles tabs to switch between sections.

-
When finished, click Save.
Updates to the Summary by Account section of PDF report templates
We've updated the Summary by Account section of the PDF report templates to allow you to add the following columns:
-
Account description
-
Account name
-
Account number
-
Account type
-
Inception date
-
Objective
-
Weight

To add one or more of these columns to the Summary by Account section of a PDF report, follow these steps:
-
On the PDF Templates menu, click Templates.
-
In the Select a template list, choose the PDF template you want to modify. If you haven’t created a PDF template, choose Create new template.
-
In the Add a section list, click Summary by Account.
-
Choose the columns you want to add to the Summary by Account section of the report:

To add a column to the report, in the Available data box, click the column you want to add and then click
.
To remove a column from the report, in the Selected data box, click the column you want to remove and then click
.
To add all available columns to the report, click
.
To remove all columns from the report, click
.
Use the
and
buttons to arrange the columns.
-
Click Save.
Inline benchmarks on the Account Performance report
In a previous release, we added a Benchmark column to the Account Performance report that made it easy for you to see your benchmark performance. However, the Benchmark column didn’t show you the name of the benchmark.
The new inline benchmarks on the Account Performance reports make it easy for you to see your benchmark performance on the Account Performance report as well as the name of the benchmark.
Before this release, the benchmarks on the Account Performance report looked like this...

With this release, benchmarks on the Account Performance report look like this...

To take a look at this enhancement, follow these steps:
-
On the Reports menu, click Account Performance.
-
In the Search accounts box, start typing the name of the account where you want to see the benchmark. When you see it in the Find data for list, click Change.
-
Click Edit.
-
Select the Include benchmark check box.
-
Click Apply.


